 Pin It
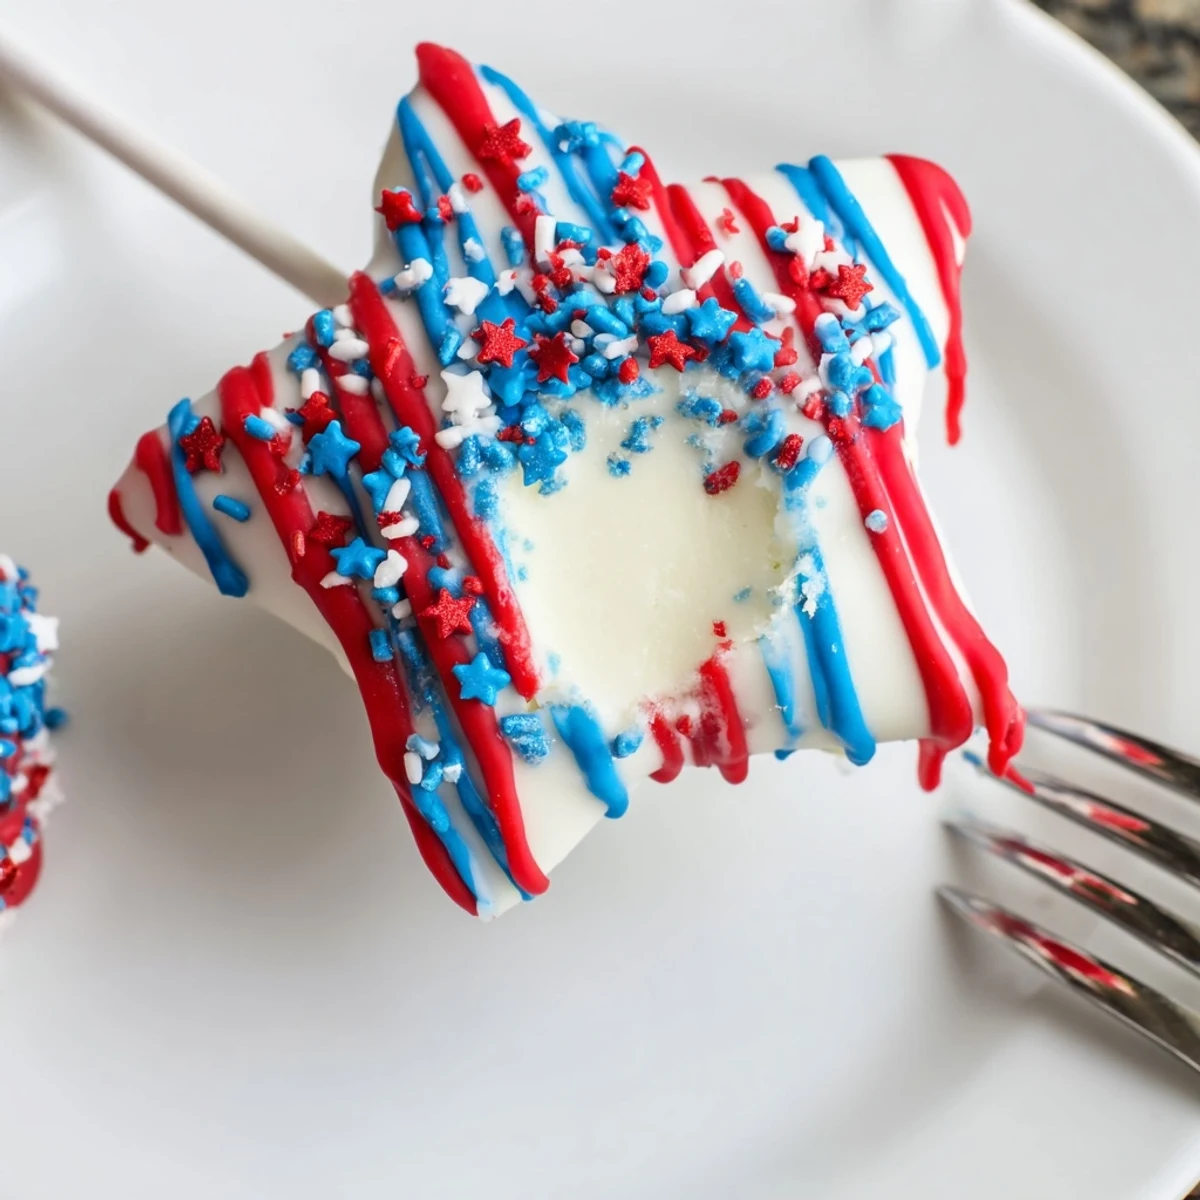
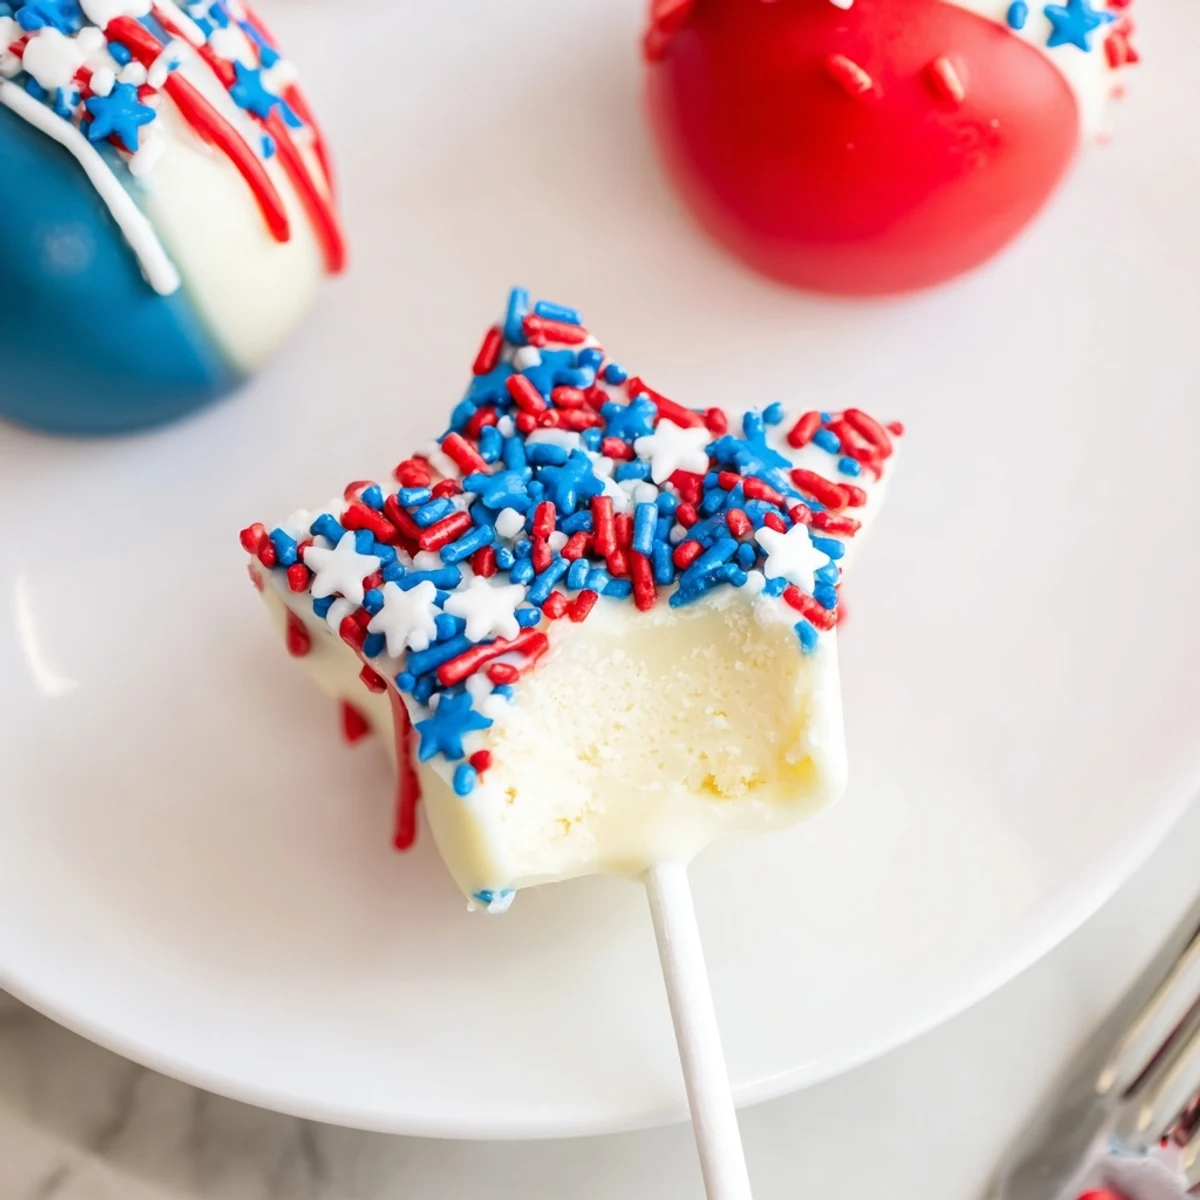
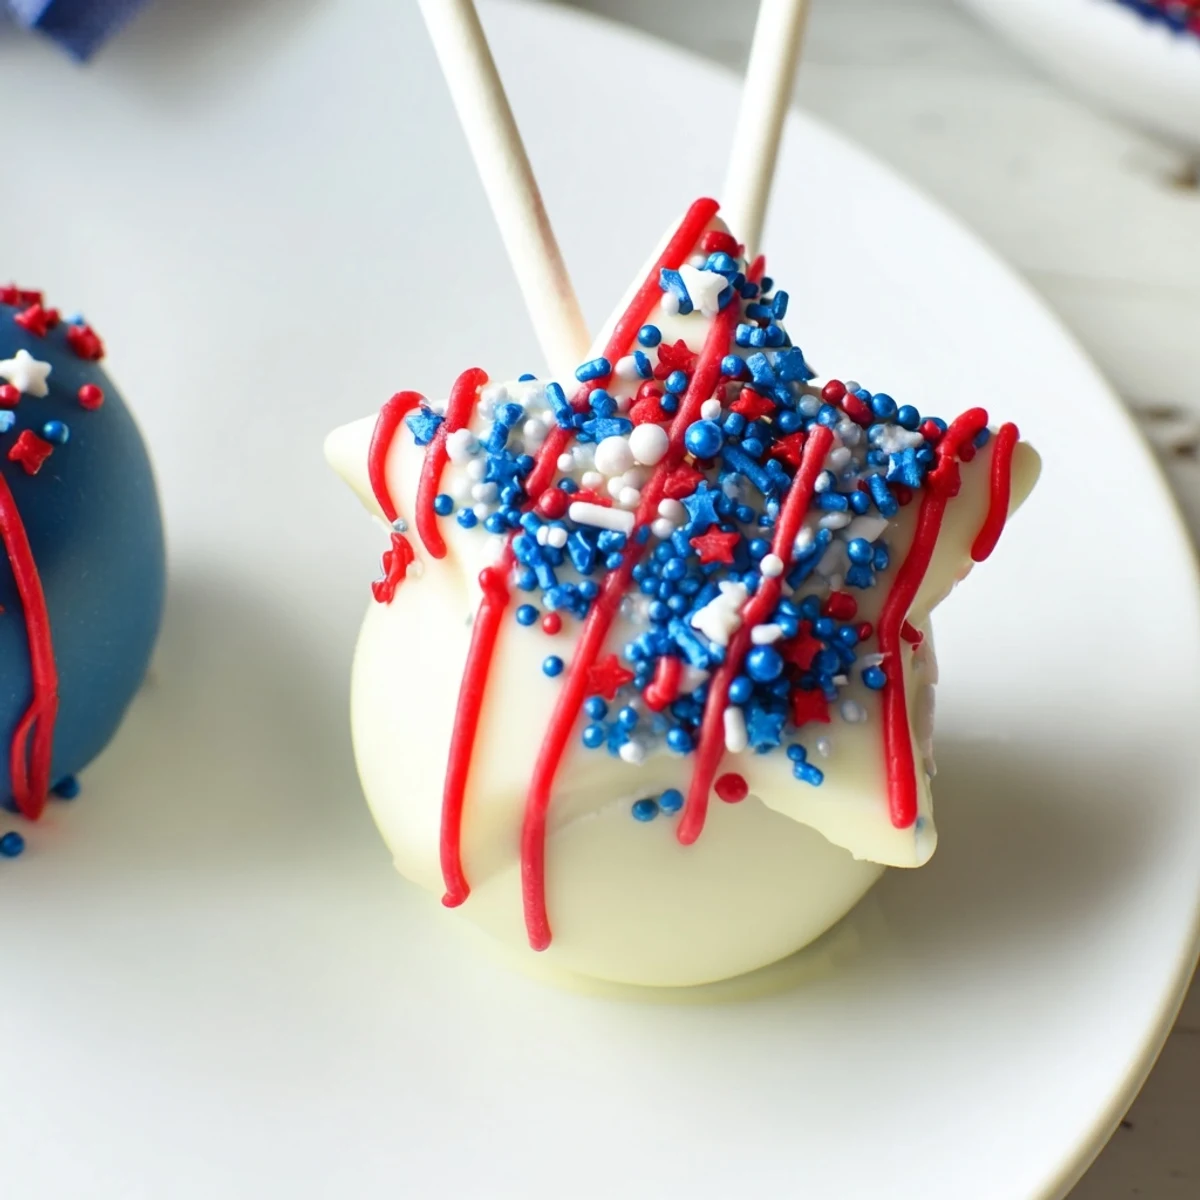
 Start by beating softened cream cheese with powdered sugar and vanilla until smooth, then fold in graham cracker crumbs. Spread, freeze until firm, and cut into stars. Insert lollipop sticks and refreeze. Melt white chocolate, tint portions red and blue, dip each star, and add sprinkles. Allow to set chilled. Makes about 16 pops; store refrigerated up to 4 days or swap crumbs for gluten-free biscuits.
The kitchen always feels brighter when there's a holiday on the horizon, and these cheesecake pops brought a burst of color to our countertop one steamy July afternoon. There was something oddly satisfying about coaxing that slightly melty dough into cheerful star shapes, red and blue food dye staining my fingertips in streaks that lasted for hours. As sprinkles danced across the counter and the window fan did its best against the heat, it felt less like work and more like a midsummer art project—edible, festive, and just messy enough to laugh about. No matter how many times you make them, the moment of dipping a pop into glossy melted chocolate is pure glee.
I once brought these star pops to a backyard barbecue where the fireworks nearly got upstaged. The kids each claimed a star and the adults did too, only pretending to resist—by the time dusk fell, all that was left were a handful of sticky sticks and lots of happy, blue-stained smiles. It turns out, the little bit of whimsy goes straight to everyone’s inner child regardless of age. Watching people compare their sprinkle patterns is half the fun.
Ingredients
- Cream cheese: For the smoothest texture, always start with room temperature cream cheese; cold blocks can make the mixture lumpy and harder to spread.
- Powdered sugar: Sifts in gently, giving that classic cheesecake sweetness without any graininess—don’t skip on whisking to dissolve every bit.
- Vanilla extract: The fragrance wraps the whole process in a nostalgic, bakery-like aroma; use real vanilla if you can for deep flavor.
- Graham cracker crumbs: These add that signature cheesecake tang and a sandy bite—press them in firmly for good star shapes.
- White chocolate or candy melts: Melts smoothly for even coating, but don’t rush the heating or it seizes—slow and steady wins the decorating game.
- Food coloring (red and blue): A tiny bit goes a long way for vivid Fourth of July pops, so tint lightly at first.
- Red, white, and blue sprinkles: More than just cute: they provide crunch and let each pop be its own mini artwork.
- Lollipop sticks: Essential for the “pop” effect; a gentle twist as you insert keeps the stars from cracking.
Instructions
- Start the cheesecake base:
- Add the softened cream cheese, powdered sugar, and vanilla to a bowl—then beat until gleaming and cloud-like, pausing to inhale the rich aroma.
- Mix and prep for chilling:
- Stir in the graham cracker crumbs, folding gently; the mixture transforms into something thick and pliable almost instantly.
- Chill into shape:
- Spread evenly on a parchment-lined baking sheet, aiming for about half an inch thick, and freeze until the surface feels firm to the touch—no peeking for at least an hour.
- Cut out the stars:
- Press the star-shaped cutter into the chilled slab, giving a little wiggle for clean edges, and lay each star carefully on new parchment.
- Insert the sticks:
- Hold each star steady and twist in a lollipop stick slowly; a gentle hand prevents any cracks or breaks, then back into the freezer they go for an extra chill.
- Prep the coating:
- Melt the white chocolate or candy melts low and slow; divide and swirl in food coloring for separate bowls of red, white, and blue.
- Dip and decorate:
- Dunk each firm star pop into melted coating, letting the excess drip off, then shower liberally with patriotic sprinkles before the chocolate sets.
- Set and serve:
- Return the finished pops to parchment and let them set at room temp or refrigerate; the shell firms up in minutes, ready for display.
 Pin It
 Once, when everyone gathered inside to escape a sudden midsummer storm, these pops turned dessert into a group project: sprinkles everywhere, someone pretending to be the "sprinkle police," and laughter filling the kitchen. It’s in those moments—aprons askew, someone licking a stray bit of chocolate off their hand—when the holiday memory is really made.
Getting the Perfect Star Shape
A sharp-edged cookie cutter makes all the difference—dull ones press and smudge instead of slice cleanly, which I learned after wrestling with my first batch. If you dust the cutter lightly with powdered sugar between cuts, the stars slip right out without sticking. Also, don’t be afraid to press firmly; the firmer the slab, the better the result.
Coloring and Decorating Without the Mess
I like to designate a "dipping station" (usually a cutting board lined with parchment) so chocolate drips and sprinkle splatter are easy to contain and clean up. Mixing food coloring into melted chocolate does require gentle folding—overdo it, and you might seize the chocolate, so move slowly and keep things cool. And just remember, even drippy, imperfectly sprinkled pops get devoured first.
Troubleshooting: From Soft Centers to Sweaty Pops
Humidity can be the enemy—sometimes, condensation tries to form on the pops straight out of the fridge, threatening to soften the coatings. Letting them air dry on parchment for a few minutes before serving usually avoids this. If the mixture feels too soft to work with, give it 15 more minutes in the freezer and try again.
- Keep pops spaced apart while chilling so they don't stick together.
- If using gel food coloring, start with a toothpick’s worth.
- Store the finished pops in a single layer for best results.
 Pin It
 If you find a stray sprinkle clinging to your shirt later, just know you did the Fourth of July right. However you share them, these star pops are sure to draw a crowd around your kitchen (or picnic table).
Recipe Questions & Answers
- → How long should I freeze the cheesecake base before cutting?
-
Freeze the spread mixture for about 1 hour until firm enough to hold a clean cut. After cutting stars and inserting sticks, refreeze for another 30 minutes to ensure they stay solid during dipping.
- → What's the best way to melt the chocolate without seizing?
-
Melt white chocolate slowly over a double boiler or in short bursts in the microwave, stirring frequently. Keep moisture away and use a few teaspoons of vegetable oil or cocoa butter if a smoother consistency is needed for dipping.
- → How can I prevent the coating from cracking once set?
-
Allow coated pops to set at room temperature briefly before refrigerating to avoid sudden temperature shocks. Ensure the base is fully frozen when dipping so the coating sets quickly and adheres smoothly without cracking.
- → What substitutions work for dietary restrictions?
-
For gluten-free, replace graham crumbs with certified gluten-free biscuits. Use dairy-free cream cheese and dairy-free melts to make a lactose-free version, but expect slight texture differences in the filling and coating.
- → Can the colored chocolate be layered for different designs?
-
Yes. Divide melted white chocolate into bowls, tint with gel food color, and drizzle or dip in stages for layered looks. Work quickly and let each layer set slightly before adding another to avoid colors bleeding.
- → How should I store the finished pops for best texture?
-
Store pops in a single layer in an airtight container in the refrigerator for up to 4 days. For longer storage, freeze them on a tray until firm, then wrap individually and freeze up to one month; thaw briefly before serving.
