 Pin It
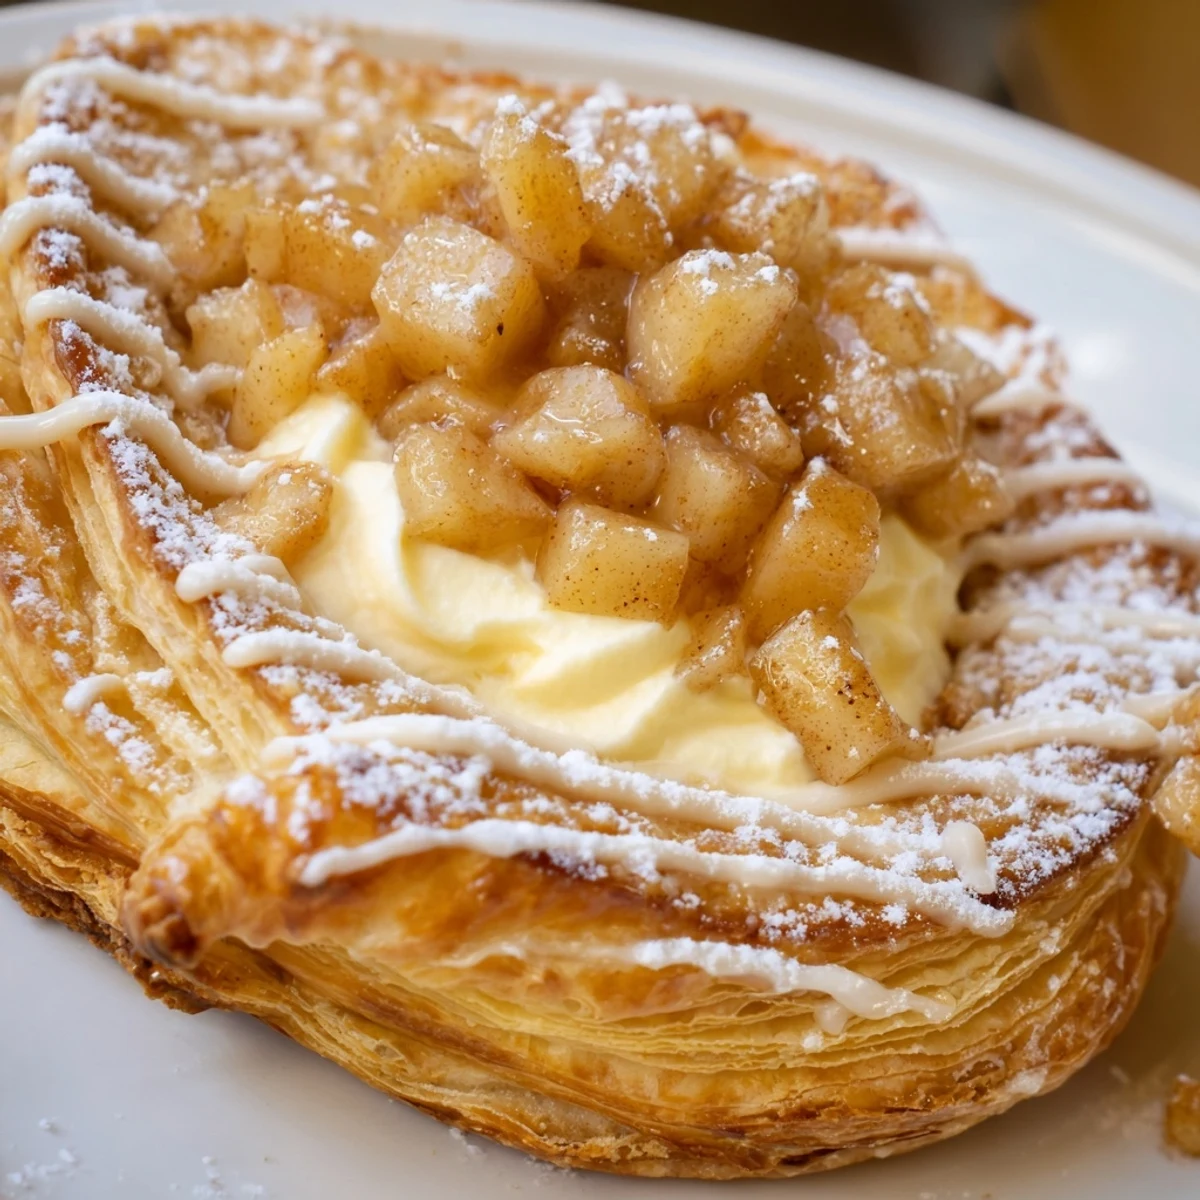
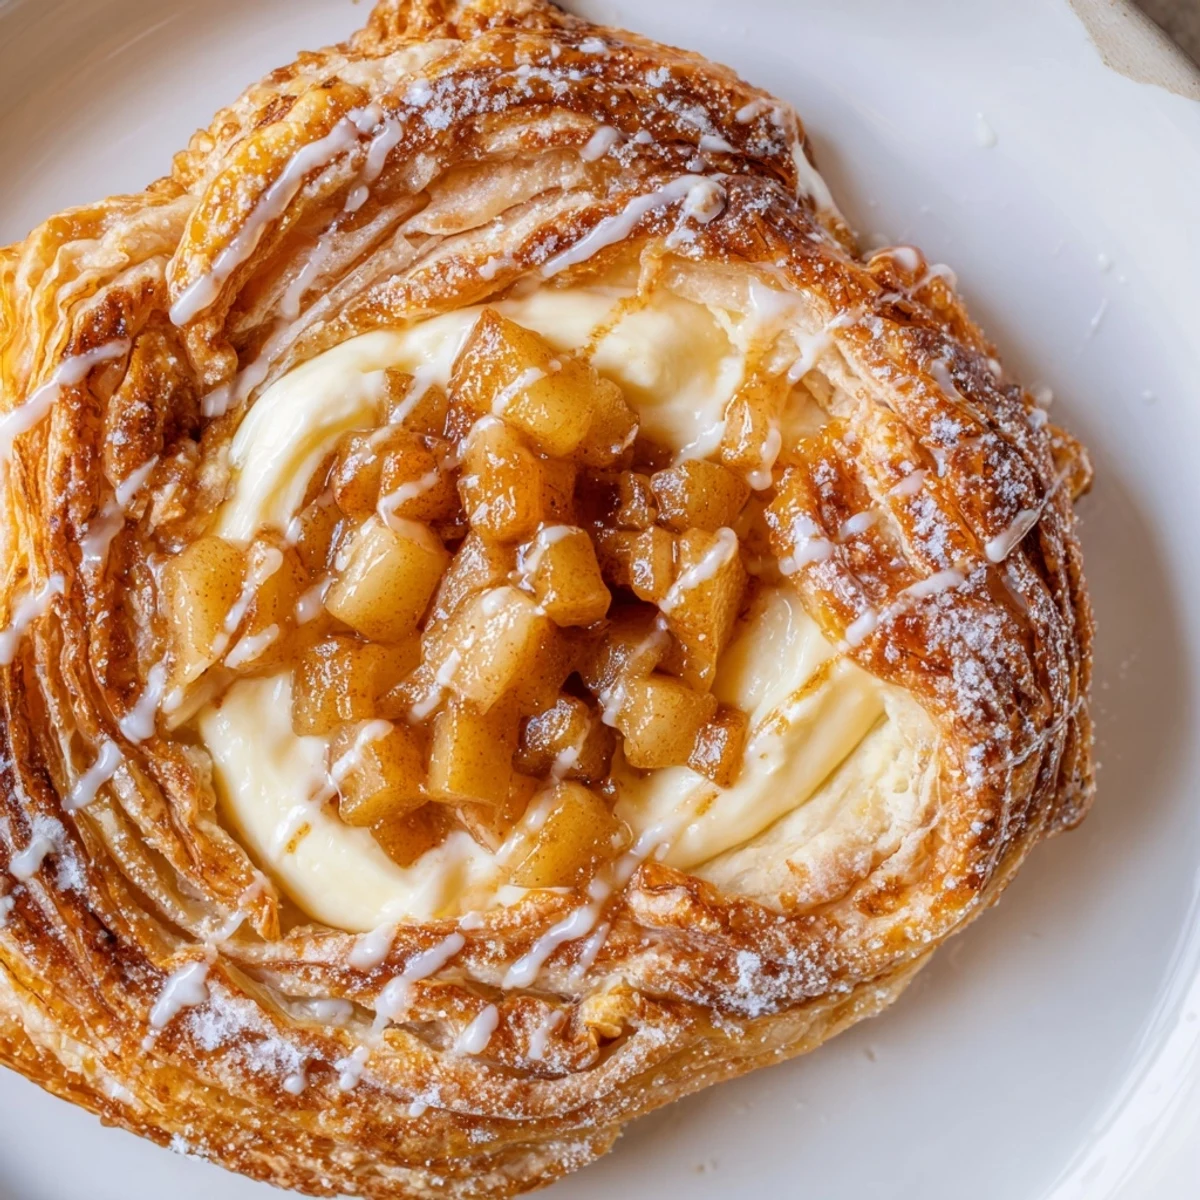
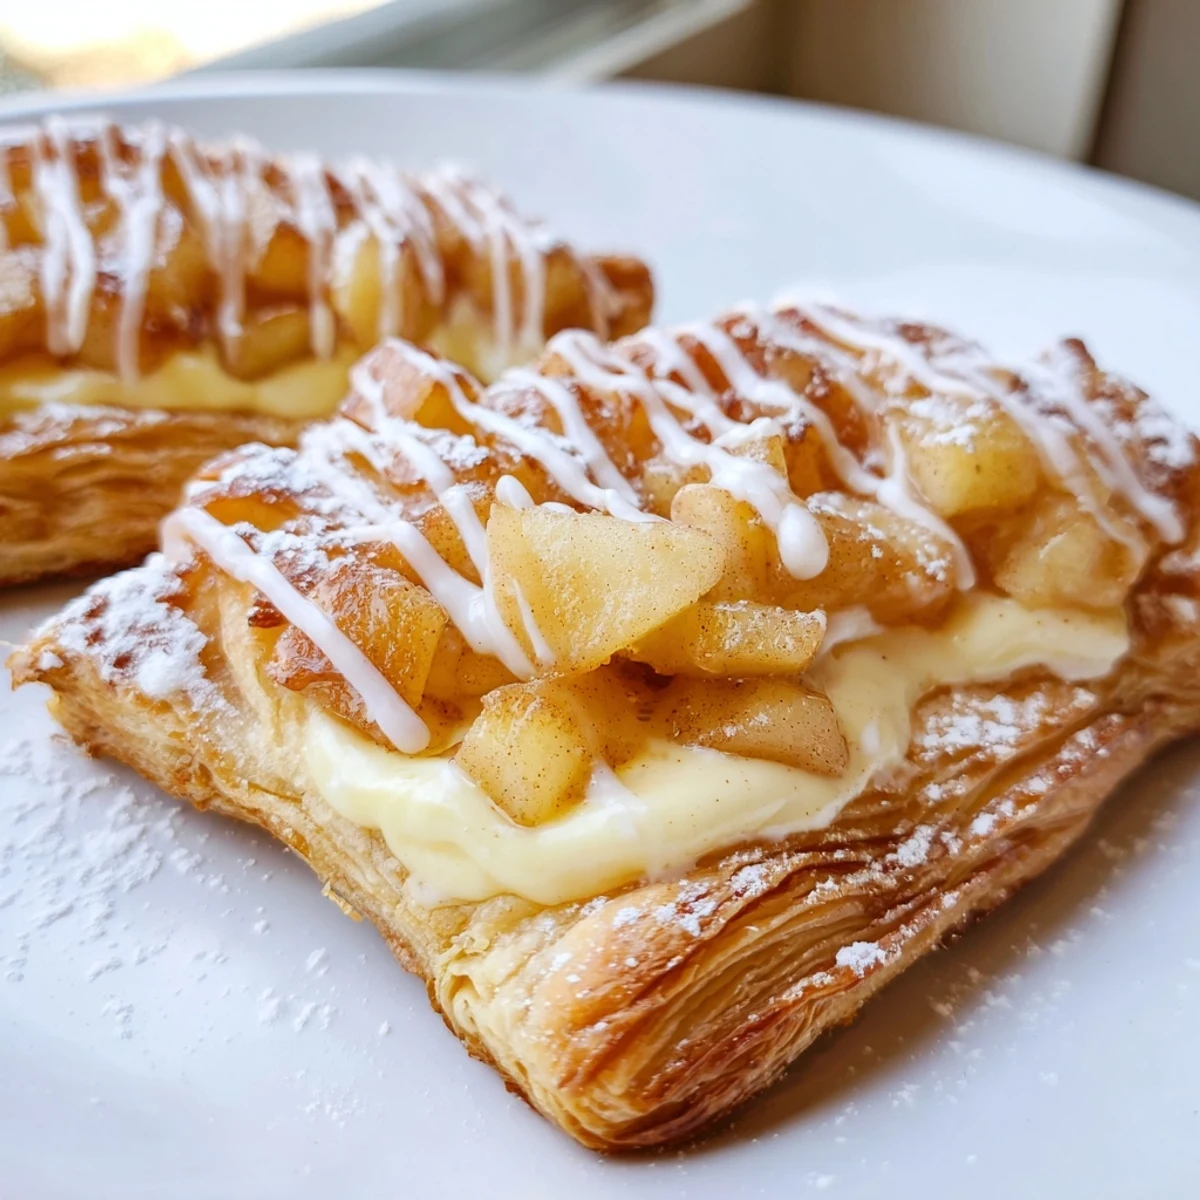
 These apple cheese danishes combine buttery, flaky puff pastry with two irresistible fillings: a smooth vanilla cream cheese layer and warmly spiced caramelized apples. Each square is assembled on a single sheet of store-bought puff pastry, scored to create puffy golden edges, then baked until beautifully risen.
Ready in under an hour, they're ideal for lazy weekend brunches, holiday mornings, or an elegant afternoon treat. A simple powdered sugar drizzle finishes them off, though they're just as delightful served plain and warm from the oven.
The smell of butter hitting a hot skillet on a lazy Sunday morning is enough to make anyone wander into the kitchen, and that is exactly how these apple cheese danishes became a weekend ritual in my house. My neighbor once knocked on my door holding a plate of her own creation and asked what on earth I was baking because the cinnamon had drifted straight through the open windows. There is something deeply satisfying about watching puff pastry rise and turn golden around pools of spiced apples and sweet cream cheese. These danishes strike the perfect balance between indulgent and comforting, and they disappear faster than anything else I make.
I made a double batch of these for a brunch potluck last fall and watched people abandon the mimosa station to hover around the pastry platter instead. One friend stood in the corner with two on her plate, refusing to share, and told me very seriously that I was not allowed to bring anything else to future gatherings.
Ingredients
- 1 sheet frozen puff pastry, thawed: Let it thaw in the fridge overnight rather than on the counter so it stays cool and workable when you roll it out.
- 1 egg, beaten: This egg wash is what gives the pastry those gorgeous glossy golden edges that make everyone reach for one before they even know what is inside.
- 180 g cream cheese, softened: Leave it out for about thirty minutes so it blends smoothly without lumps, because nobody wants a chunky filling.
- 50 g granulated sugar: Just enough sweetness to let the cream cheese hold its own against the spiced apples without becoming cloying.
- 1 tsp vanilla extract: A good quality vanilla makes a noticeable difference here since the filling has so few ingredients.
- 2 medium apples, peeled, cored, and finely diced: Granny Smith apples are my go to because their tartness cuts through the richness, but use whatever you have on hand.
- 30 g unsalted butter: This forms the base of the apple filling and creates that syrupy caramel sauce that pools around the fruit.
- 2 tbsp brown sugar: It melts into the butter and coats every apple piece in a deep, molasses tinged glaze.
- 1/2 tsp ground cinnamon: The warm spice that ties everything together and makes your kitchen smell incredible.
- 1/4 tsp ground nutmeg: Just a whisper of nutmeg adds complexity without overpowering the cinnamon.
- 1 tsp lemon juice: A squeeze of brightness that keeps the apples from turning brown and balances the sweetness beautifully.
- 30 g powdered sugar: For the optional drizzle that makes these look like they came from a professional bakery.
- 2 to 3 tsp milk or lemon juice: Mixed with powdered sugar to create a quick icing that sets into a pretty finish.
Instructions
- Get the oven ready:
- Preheat your oven to 200 degrees Celsius and line a baking tray with parchment paper so nothing sticks.
- Cook the apple filling:
- Melt the butter in a skillet over medium heat, then add the diced apples, brown sugar, cinnamon, nutmeg, and lemon juice. Stir often for about seven minutes until the apples soften and the juices thicken into a glossy syrup, then set aside to cool completely.
- Whip up the cream cheese filling:
- Beat the softened cream cheese, granulated sugar, and vanilla extract together in a bowl until silky smooth and spreadable.
- Prepare the pastry squares:
- Roll out the thawed puff pastry on a lightly floured surface to smooth out any creases, then cut it into eight equal squares and arrange them on your prepared tray.
- Score and assemble:
- Use a knife to lightly score a smaller square inside each pastry piece without cutting all the way through, prick the center a few times with a fork, then spread cream cheese filling inside the border and spoon the cooled apple mixture on top.
- Brush and bake:
- Brush the exposed pastry edges with beaten egg and bake for eighteen to twenty two minutes until dramatically puffed and deep golden brown.
- Drizzle and serve:
- Let the danishes cool slightly on the tray, then whisk powdered sugar with just enough milk or lemon juice to make a pourable icing and zigzag it over the tops before serving warm or at room temperature.
 Pin It
 The first time I pulled these from the oven, my cat sat on the kitchen counter staring at them with more intensity than she has ever shown toward actual cat food, and I understood in that moment that I had created something special.
Choosing the Right Apples
Firm, tart apples hold their shape during cooking and provide a nice contrast to the sweet rich filling. I have tried these with Honeycrisp, Braeburn, and even leftover Pink Lady apples from a cheese board, and each variety brings its own personality to the danish. Sweeter apples like Fuji work too, but you may want to reduce the brown sugar slightly so the filling does not become overly sweet.
Getting the Puff Pastry Right
Puff pastry is forgiving but it does have opinions about temperature. If the dough gets too warm while you are working with it, pop it back in the fridge for ten minutes before cutting and assembling. Work quickly and confidently because hesitant hands lead to uneven squares and sad looking danishes.
Serving and Storing
These danishes are at their absolute best within the first few hours of baking when the pastry is still shatteringly crisp and the fillings are warm. If you need to store leftovers, keep them in an airtight container at room temperature for up to two days and reheat gently in a low oven to crisp the pastry back up.
- A sprinkle of chopped pecans or walnuts on top of the apple filling before baking adds a wonderful crunch.
- You can assemble these the night before, cover and refrigerate them, then bake fresh in the morning for an effortless breakfast.
- Always check your store bought puff pastry label if allergies are a concern, as some brands contain traces of nuts or soy.
 Pin It
 Make a double batch because watching people eat these for the first time is one of the great joys of home baking. They are messy, golden, and completely worth every flaky crumb that lands on your countertop.
Recipe Questions & Answers
- → Can I use homemade puff pastry instead of store-bought?
-
Absolutely. Homemade puff pastry will yield an even flakier, richer result thanks to the layered butter. Just make sure it's rolled to a similar thickness as a standard frozen sheet so the baking time remains consistent.
- → What type of apples work best for these danishes?
-
Tart, firm apples like Granny Smith hold their shape beautifully during cooking and balance the sweetness of the cream cheese filling. Honeycrisp, Braeburn, or Pink Lady are also excellent choices for a slightly sweeter profile.
- → How should I store leftover danishes?
-
Place cooled danishes in an airtight container at room temperature for up to one day, or refrigerate for up to two days. To reheat, warm them in a 170°C (340°F) oven for about 5 minutes to re-crisp the pastry. Avoid microwaving, as it makes puff pastry soggy.
- → Can I prepare the fillings ahead of time?
-
Yes, both fillings can be made a day in advance. Store the cream cheese mixture covered in the refrigerator, and keep the cooled apple filling in a separate container. When ready to assemble, let the cream cheese soften slightly at room temperature for easier spreading.
- → Why do I need to score the pastry square without cutting through?
-
Scoring creates a border that puffs up dramatically in the oven, forming natural raised edges that hold the fillings in place. It's essential not to cut all the way through, or the filling will leak out and the characteristic danish shape won't form.
- → Can I freeze assembled danishes before baking?
-
You can freeze them unbaked on a tray until solid, then transfer to a freezer bag for up to one month. Bake from frozen, adding 3–5 extra minutes to the baking time. The egg wash can be applied just before they go into the oven.