 Pin It
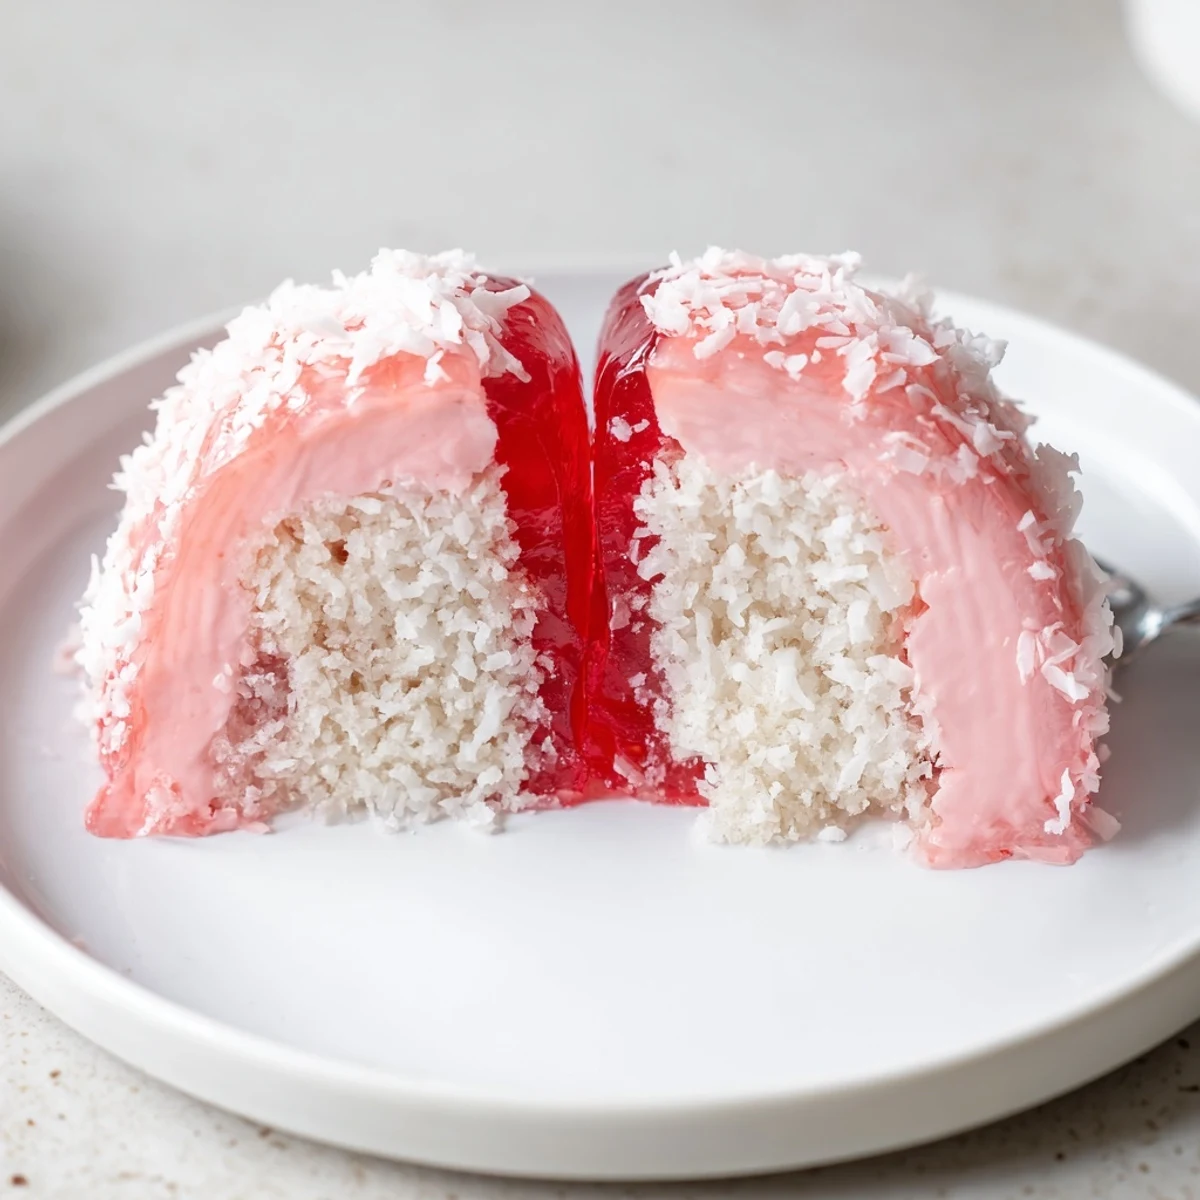
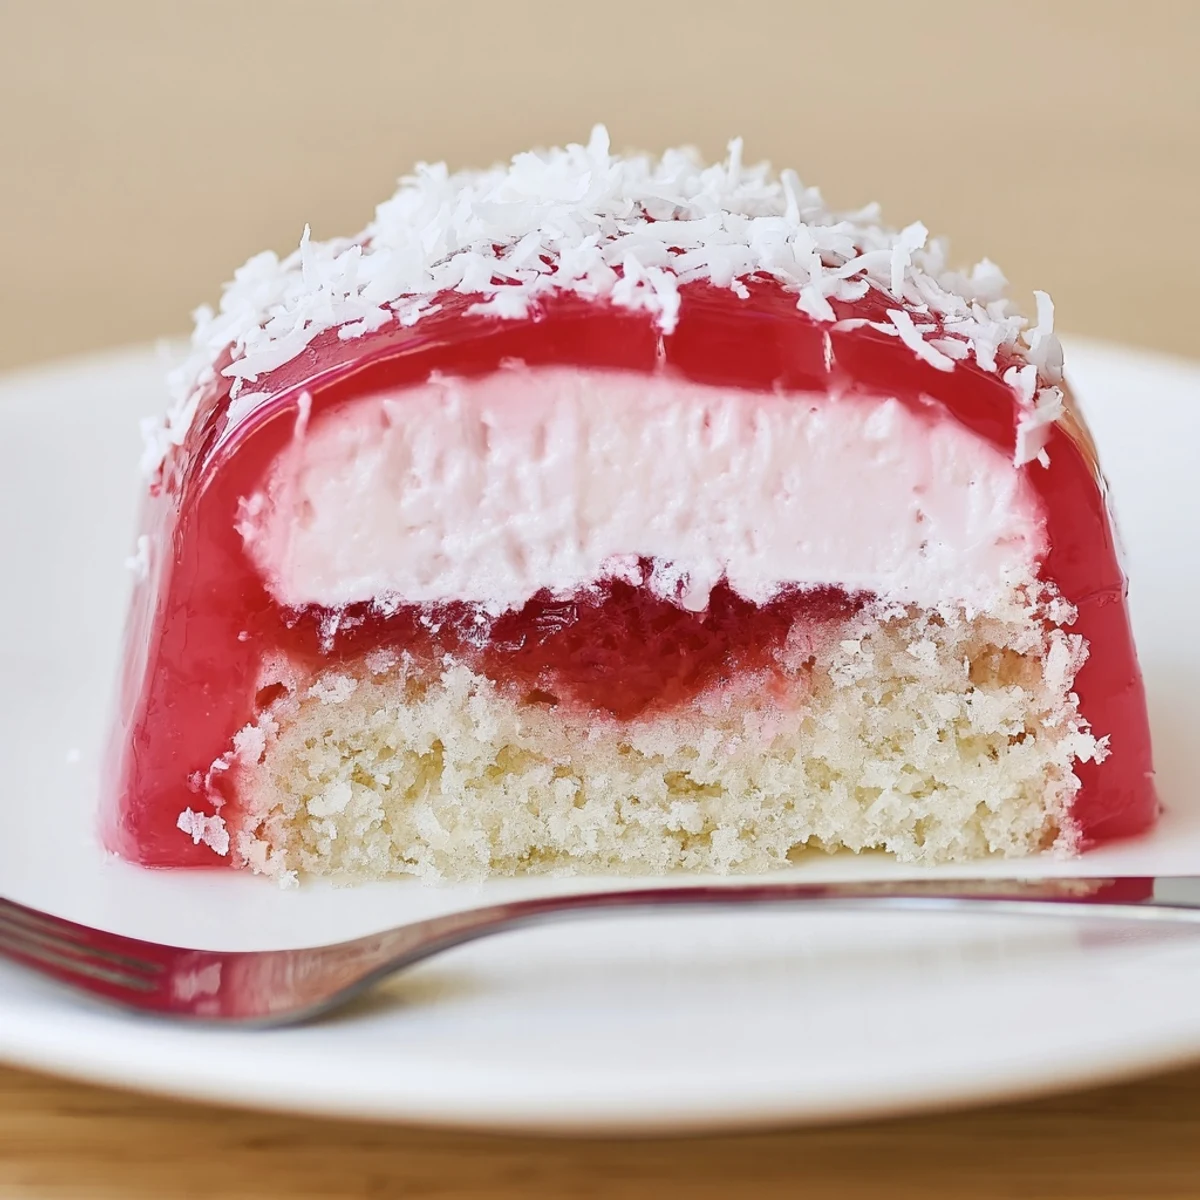
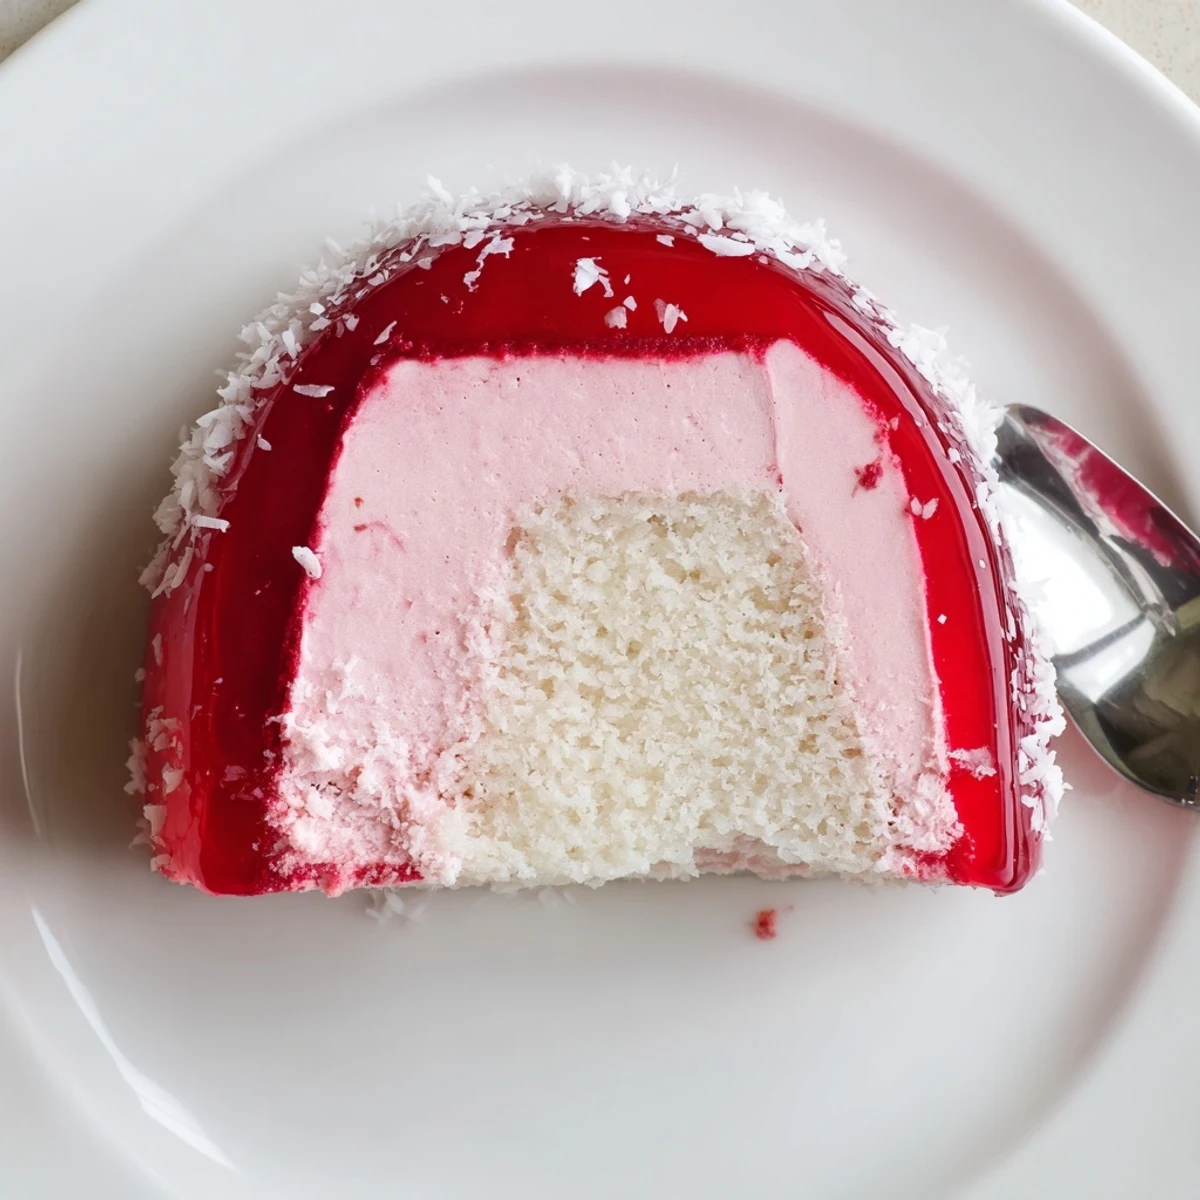
 These nostalgic Old Fashioned Pink Jelly Cakes begin with a light self-raising sponge baked in a sheet pan, cooled and cut into squares. Jelly crystals are dissolved in boiling water and chilled until semi-set, then used to coat sandwiched squares filled with whipped cream. Each piece is rolled in desiccated coconut and chilled briefly to firm. Try passionfruit or orange jelly for a twist, or swap in whipped coconut cream for a dairy-free option.
The afternoon sun would pour through my nans kitchen window and the whole bench would be dusted white with coconut, little pink finger marks everywhere. She called them her fancy cakes and only ever made them when someone was coming over for tea. I thought they were the most elegant thing a person could eat, wobbly and cold and sweet. I still feel like a kid every time I pull a tray of them from the fridge.
I once brought a batch to a friends barbecue and watched a grown man eat five of them standing up before dinner was even served.
Ingredients
- Unsalted butter (125 g): Softened to room temperature so it creams smoothly without lumps.
- Caster sugar (125 g): Finer than regular sugar and it dissolves faster for a lighter sponge.
- Eggs (2 large): Room temperature eggs incorporate better and give the cake more lift.
- Vanilla extract (1 tsp): Use real extract, not imitation, because the sponge is simple and every flavour shows.
- Self-raising flour (180 g): Sift it twice for extra air and a tender crumb.
- Milk (100 ml): Whole milk keeps the batter loose enough to spread evenly.
- Raspberry jelly crystals (85 g packet): Raspberry is classic but strawberry works beautifully too.
- Boiling water (250 ml): Dissolves the crystals completely so there are no gritty patches.
- Cold water (150 ml): Brings the jelly temperature down fast so it sets to the right consistency for dipping.
- Thickened cream (200 ml): Heavy cream whipped to firm peaks holds the sponge sandwiches together.
- Icing sugar (1 tbsp): Just enough sweetness for the filling without making it cloying.
- Vanilla extract (1/2 tsp): A second layer of vanilla in the cream ties the whole thing together.
- Desiccated coconut (100 g): Spread it on a wide plate for easy rolling and full coverage.
Instructions
- Prepare the oven and tin:
- Heat the oven to 180 degrees Celsius, grease the tin and line it with baking paper so nothing sticks.
- Cream butter and sugar:
- Beat the softened butter and caster sugar with an electric mixer until the mixture turns pale and feels fluffy, about three minutes of patient mixing.
- Add eggs and vanilla:
- Drop in one egg at a time, beating well after each, then pour in the vanilla and let it swirl through.
- Fold in flour and milk:
- Alternate small scoops of sifted flour with splashes of milk, folding gently with a large spoon until everything is just combined.
- Bake the sponge:
- Spread the batter evenly in the tin and bake for 12 to 15 minutes until the top springs back lightly and a skewer slides out clean.
- Make the jelly:
- Dissolve the jelly crystals in boiling water, stir in the cold water, pour it into a shallow dish and refrigerate until it just begins to wobble at the edges.
- Cut and fill:
- Cut the cooled sponge into 24 equal squares, whip the cream to firm peaks and sandwich pairs of squares together with a generous spoonful.
- Dip and roll:
- Quickly dip each sandwiched cake into the semi set jelly to coat all sides, shake off the excess and roll immediately in coconut.
- Chill before serving:
- Arrange the coated cakes on a wire rack and refrigerate for at least 30 minutes so the jelly firms up and everything holds together.
 Pin It
 My nan used to wrap each one in a square of wax paper and tuck them into a tin in the fridge, and opening that lid felt like opening a present.
Getting the Jelly Texture Right
Start checking the jelly at the 45 minute mark by tilting the dish gently. It should ripple slowly like a loose gel, not slosh like water. If it firms too much you can microwave it in short bursts to loosen it back up, but that window of perfect texture is narrow so stay close to the fridge.
Making Them Your Own
Passionfruit jelly gives the cakes a tropical sharpness that cuts through the cream beautifully. Orange jelly is another surprise hit and tastes like a creamsicle in cake form. For a dairy free version, whip chilled coconut cream instead of regular cream and use a plant based butter in the sponge.
Serving and Storing
These cakes are at their absolute best on the day they are made, when the coconut is still dry on the outside and the sponge has not gone soft. If you need to store them, keep them in a single layer in an airtight container in the fridge.
- Let them sit at room temperature for ten minutes before serving so the jelly softens slightly.
- Do not stack them or the coconut will press flat and stick together.
- Always check your jelly crystal packet for allergen information because brands vary.
 Pin It
 Some recipes are just food and some are a feeling you get to eat, and these little pink cakes are absolutely the second kind.
Recipe Questions & Answers
- → How do I know when the jelly is ready for dipping?
-
Chill dissolved jelly until it reaches a syrupy, semi-set stage — it should coat the back of a spoon but still flow slowly. This texture adheres to the sponge without melting the cream.
- → Can I use fresh fruit instead of jelly?
-
Fresh fruit adds great flavor but won’t provide the glossy coating. You can stir chopped berries into whipped cream for filling, then roll in coconut, though the classic pink glaze will be absent.
- → How do I prevent the sponge from becoming soggy?
-
Cool the sponge completely before assembling. Dip quickly into semi-set jelly and let excess drip off on a rack; refrigerate soon after to allow the coating to set and keep the interior texture light.
- → What's a good dairy-free swap for the whipped cream?
-
Use chilled whipped coconut cream (full-fat canned coconut milk whipped until firm) and a little icing sugar to stabilize. It holds shape well and pairs nicely with tropical jelly flavors.
- → How long can these be stored?
-
Store refrigerated in a single layer for up to 24 hours; they’re best the same day. Longer storage softens the coconut coating and the sponge texture changes.
- → Any tips for cutting the sponge evenly?
-
Use a sharp knife and cool the sheet cake completely. Trim edges, then measure and cut into equal squares, wiping the knife between cuts for clean sides.
