 Pin It
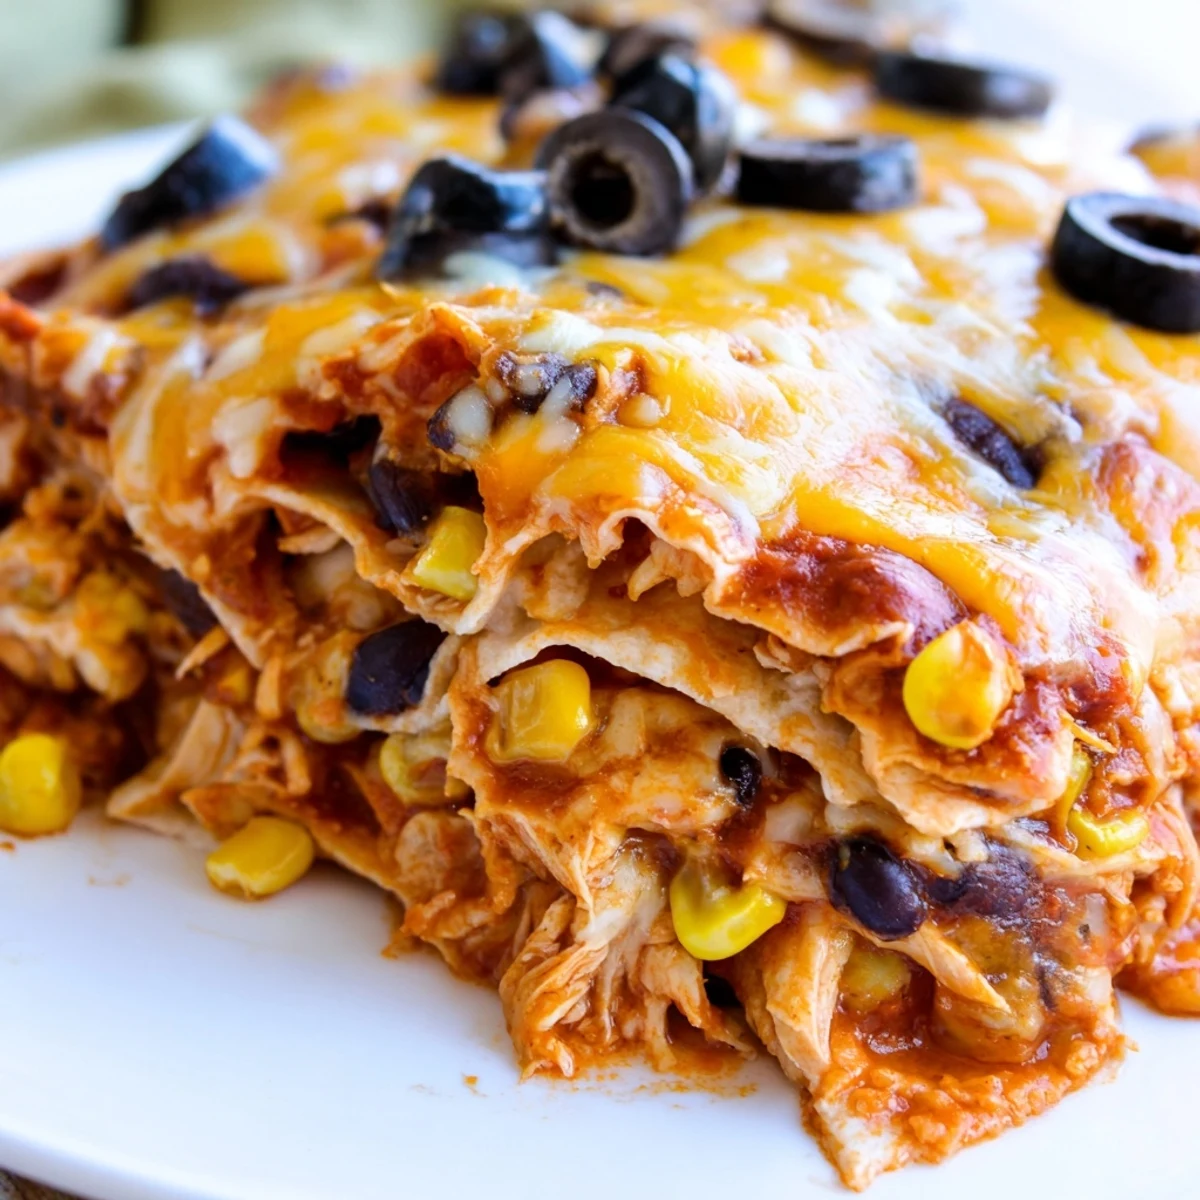
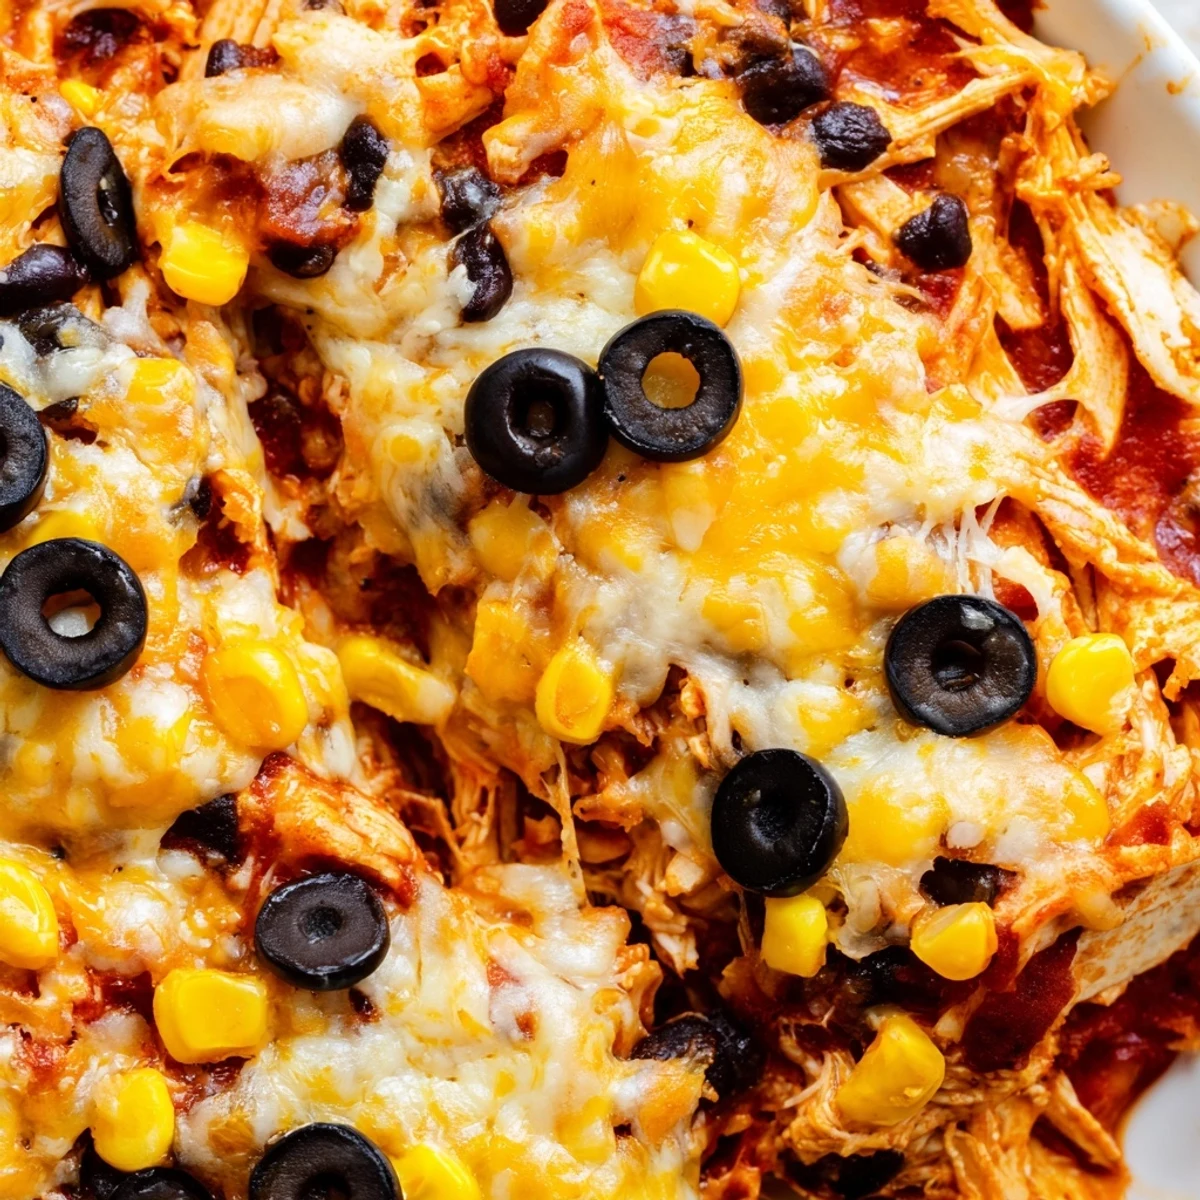
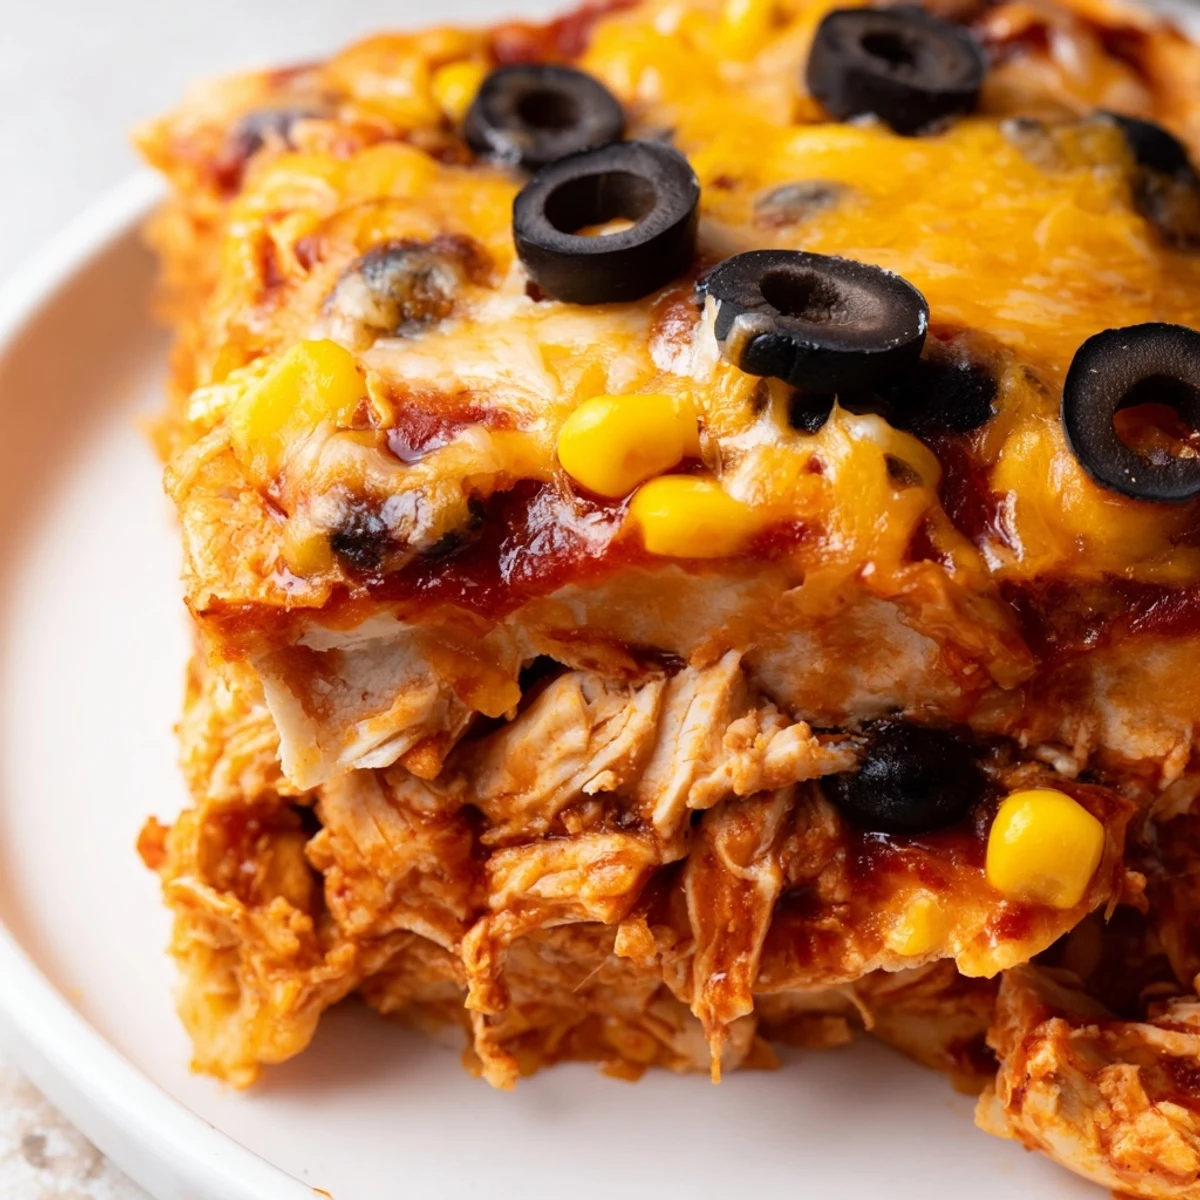
 This satisfying Tex-Mex bake comes together with just 20 minutes of prep. Shredded chicken mingles with black beans, corn, and aromatic spices in rich enchilada sauce, layered between soft tortillas and blanketed in melted Mexican cheese blend. The result is a bubbling, golden casserole that serves six hungry people.
Customize with your favorite toppings like fresh avocado, cilantro, and sour cream. Leftovers reheat beautifully for lunch the next day.
The smell of cumin and chili powder hitting hot enchilada sauce always transports me back to my first apartment kitchen, where I learned that some of the best meals start with humble ingredients and a little creativity. This recipe evolved from countless Tuesday nights when I needed something that could feed unexpected guests without breaking the bank or requiring hours of prep work. Now it's become one of those dishes I can make almost entirely from memory, hands moving through the familiar rhythm while chatting with whoever wandered into the kitchen.
Last winter my sister showed up at my door with three bags of groceries and a craving that only melted cheese could satisfy. We doubled the recipe, accidentally used way too much garlic powder, and ended up eating it straight from the baking dish while watching terrible movies until midnight. That night taught me that the best comfort food isn't just about what's on the plate, it's about who's sitting across from you, reaching for seconds.
Ingredients
- 3 cups cooked, shredded chicken: Rotisserie chicken saves time and adds that seasoned depth that home-poached chicken sometimes lacks
- 2 cups red enchilada sauce: I keep trying different brands until I find one with that perfect balance of heat and tang, but homemade changes everything
- 1 cup canned black beans, drained and rinsed: These add earthiness and protein while stretching the filling further than you'd expect
- 1 cup corn kernels: Fresh corn gives sweet pops of texture but frozen works perfectly when that's what you have
- 1 small red onion, finely diced: The sharp bite mellows beautifully as it bakes, weaving sweetness through every layer
- 1 tsp ground cumin and 1 tsp chili powder: These are the backbone that makes the filling taste like something you'd get from a truck parked on a dusty corner
- 1/2 tsp garlic powder: A little goes a long way and distributes more evenly than fresh garlic in this type of filling
- Salt and pepper, to taste: Don't skip this step, the seasoning ties everything together
- 8 small flour or corn tortillas: Corn gives it that authentic earthy flavor while flour stays pliable longer, choose based on your texture preference
- 2 cups shredded Mexican cheese blend: The pre-shredded mix melts better than hand-shredded cheese, something I discovered after years of clumpy results
- Optional toppings like olives, cilantro, green onions, avocado: These aren't just garnish, they bring brightness and fresh contrast to the rich, hot bake
Instructions
- Preheat and prepare your canvas:
- Heat your oven to 375F and give a 9x13 baking dish a quick swipe of oil, then grab your biggest bowl because this recipe is all about the mixing before the baking happens
- Build your flavor foundation:
- Combine the chicken, a cup of enchilada sauce, beans, corn, onion, cumin, chili powder, garlic powder, salt, and pepper until everything's evenly coated and smells like a taco truck parked in your kitchen
- Lay the groundwork:
- Spread half a cup of sauce across the bottom of your dish, then arrange four tortillas over it, tearing them as needed so they cover every inch like a patchwork quilt
- Start the layering game:
- Spread half that beautiful chicken mixture over the tortillas, shower it with two-thirds cup of cheese, then repeat with more tortillas and the remaining filling
- Bring it all together:
- Top with the last tortilla layer, pour the remaining sauce over everything so no dry edges remain, then finish with the rest of the cheese and olives if you're using them
- Bake until bubbly:
- Cover tightly with foil and bake for 20 minutes, then remove the foil and let it go another 10 until the cheese is bubbling and turning golden in spots
- The hardest part:
- Let it rest for 5 minutes so the layers set slightly, then add those fresh toppings and serve immediately while it's still meltingly good
 Pin It
 This dish showed up at my family's Christmas potluck one year when I completely forgot I was supposed to bring a main course. My grandmother took one bite, asked for the recipe, and then made it every Sunday for the next three months until she'd finally adjusted the spices to her exact liking. There's something about a casserole that invites people to gather around, passing plates and telling stories while cheese stretches from the serving spoon to waiting plates.
Make It Your Own Way
The beauty of this recipe is how it adapts to whatever you're craving or whatever's languishing in your pantry. Sometimes I swap the chicken for shredded pork left over from Sunday's roast, and honestly, the smoky depth makes it even better than the original. I've made it with roasted sweet potatoes tucked into the layers, and the way their creaminess blends with the cheese creates something entirely unexpected and wonderful.
Getting The Texture Just Right
The difference between good and great comes down to the tortilla-to-sauce ratio. I learned through too many dry edges that every tortilla should have some contact with sauce, either from the filling or from that initial layer spread across the bottom. Sometimes I'll brush the top tortilla layer with a little oil before baking, which gives the exposed parts that satisfying crispness that contrasts with the soft, saucy layers underneath.
Planning Ahead Like A Pro
This is one of those magical recipes that tastes even better when made ahead, letting all those spices meld and deepen while it sits in the refrigerator. I've assembled it the night before, covered it tightly, and just added 10 minutes to the baking time the next day, which means no last-minute scrambling when guests arrive and more time for actually enjoying the people you're feeding.
- Wrap it tightly and freeze unbaked for up to a month, then thaw overnight in the refrigerator before baking
- The filling can be made a day ahead and kept refrigerated, making assembly feel almost effortless
- Leftovers reheat beautifully in the microwave and somehow taste even better for lunch the next day
 Pin It
 Serve this steaming from the oven with cold drinks and warm company, and watch how quickly a simple dinner becomes one of those nights everyone talks about for months. The best recipes are the ones that bring people back to the table again and again.
Recipe Questions & Answers
- → Can I make this ahead of time?
-
Yes, assemble the entire casserole up to 24 hours in advance and refrigerate. Add 5-10 minutes to baking time if baking cold from the refrigerator.
- → What type of chicken works best?
-
Rotisserie chicken is perfect for convenience, but poached or baked chicken breasts work equally well. Just ensure it's fully cooked and shredded before mixing with the sauce.
- → Can I freeze this dish?
-
Absolutely. Assemble, wrap tightly, and freeze for up to 3 months. Thaw overnight in the refrigerator before baking as directed.
- → How do I make it vegetarian?
-
Replace the chicken with an extra cup each of black beans and corn. Consider adding diced bell peppers or mushrooms for extra texture and flavor.
- → What toppings go well with this?
-
Fresh toppings balance the rich, cheesy layers. Try sliced avocado, chopped cilantro, green onions, sour cream, pickled jalapeños, or a squeeze of fresh lime juice.
- → Can I use corn tortillas instead of flour?
-
Yes, corn tortillas work great and make the dish gluten-free. Warm them slightly before layering to prevent cracking.
