 Pin It
 Craft bakery-style English muffins in your kitchen with this straightforward approach. These soft, pillowy rounds develop beautiful golden crusts while maintaining their signature interior texture—those beloved nooks and crannies that catch melted butter and jam perfectly.
The dough comes together with basic pantry staples: bread flour, yeast, milk, and butter. After rising, simply cut into rounds and cook on a griddle until both sides achieve that classic deep golden color. The low-medium heat ensures thorough cooking without burning the exterior.
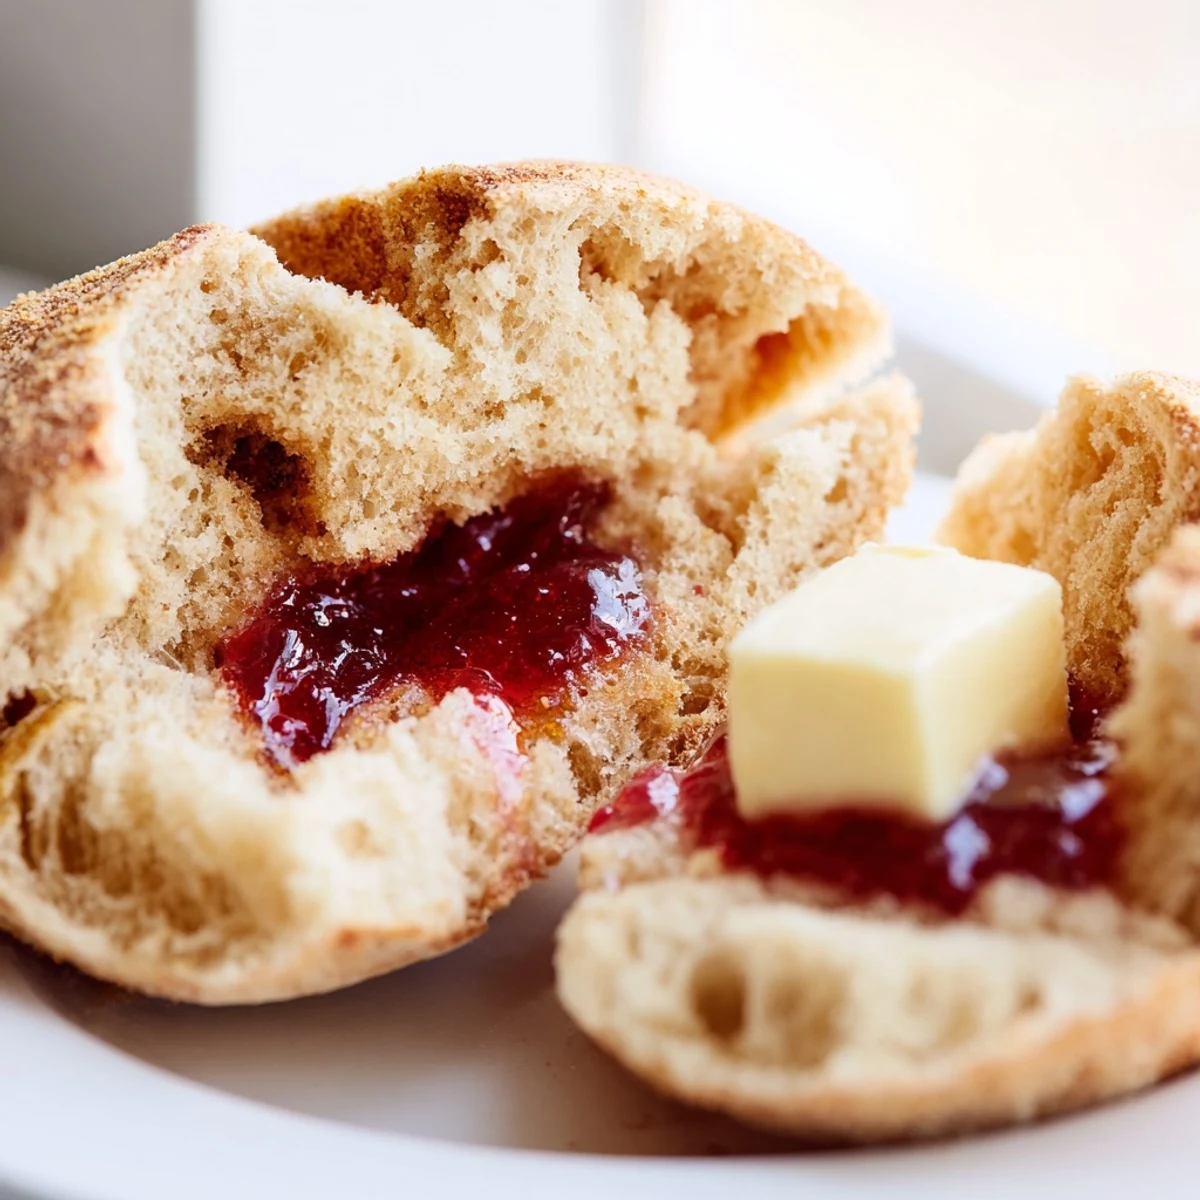
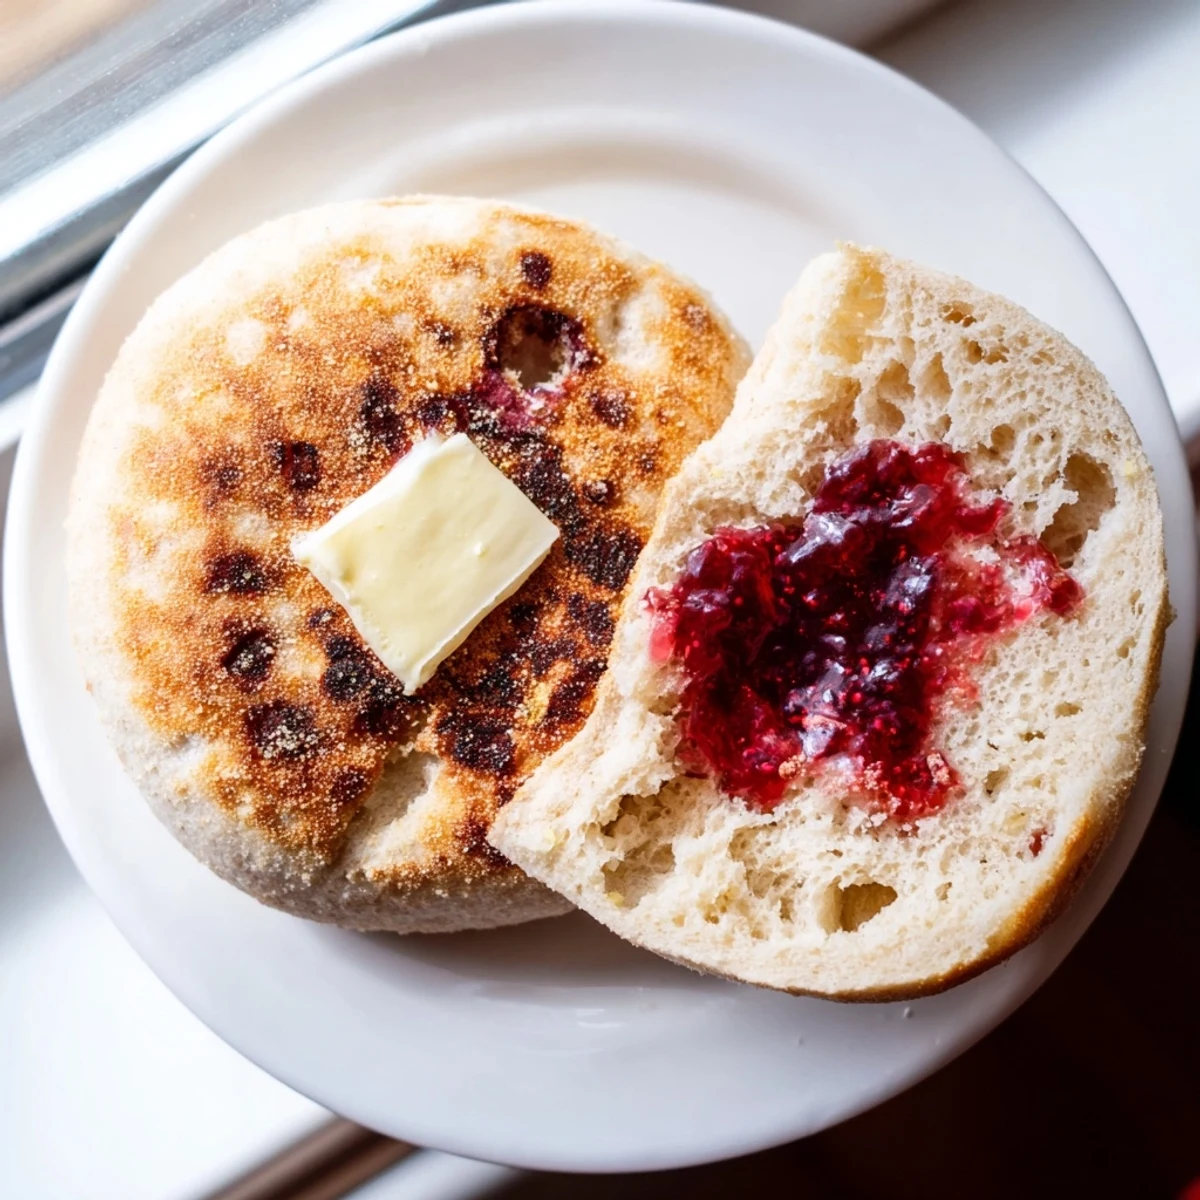
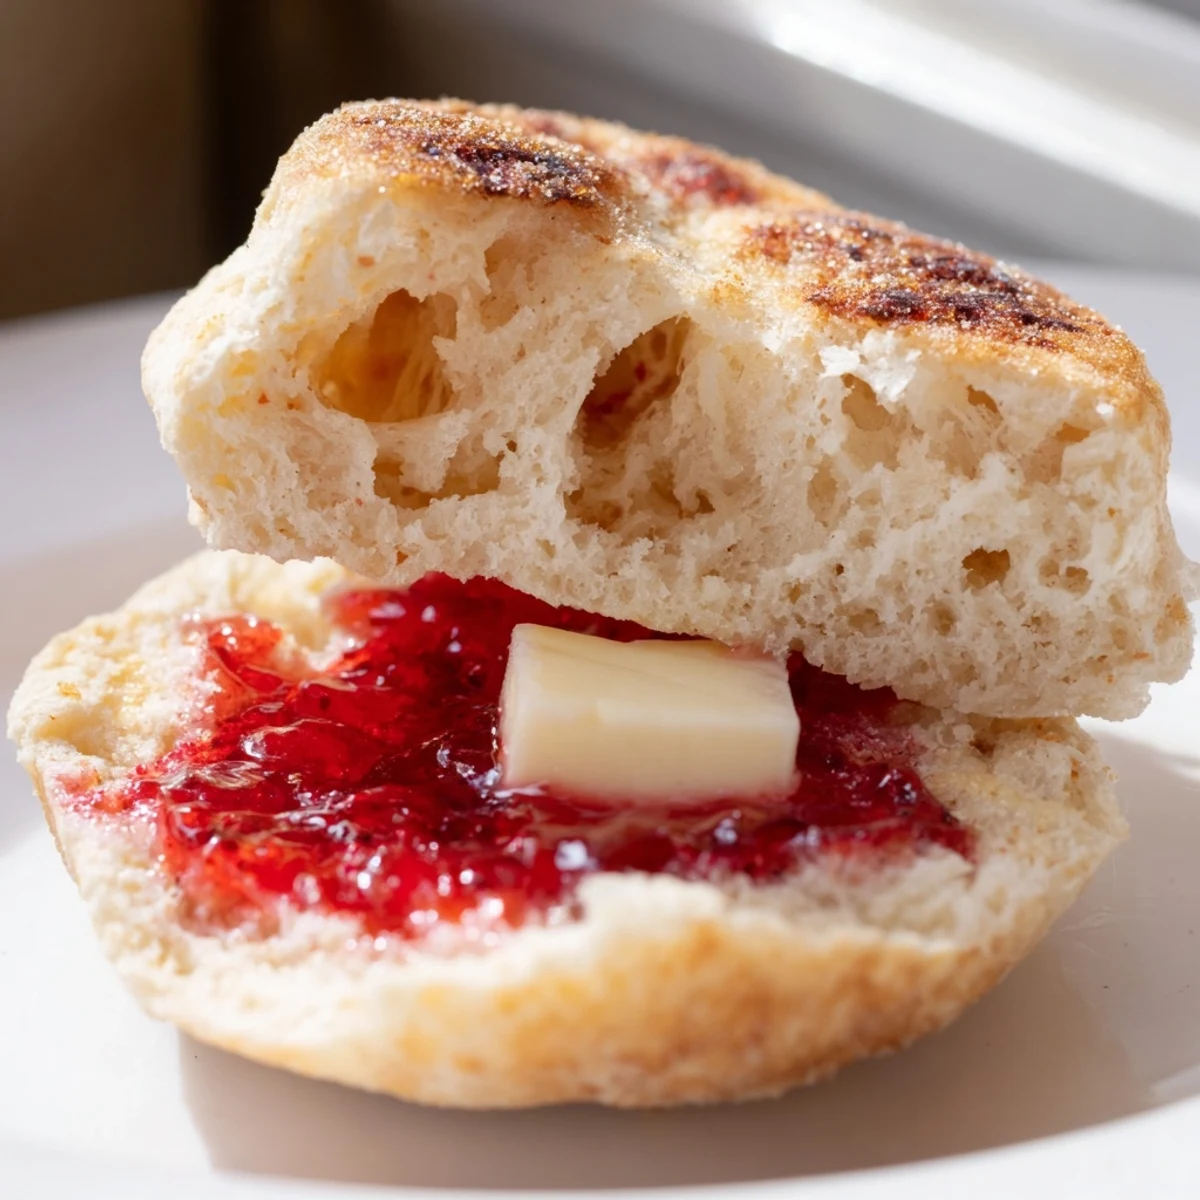
Split with a fork (not a knife) to preserve those characteristic craggy edges, then toast until warm and crisp. These store beautifully for days and freeze exceptionally well, making them ideal for weekend meal prep. Customization is simple—add cinnamon or raisins to the dough, or swap in plant-based ingredients for a vegan version.
My grandmother always said the best breads require patience, and these English muffins taught me that lesson the hard way. I remember rushing through the first rise once, ending up with flat, disappointing discs that refused to puff on the griddle. Now I treat those waiting hours as a gift, not a burden, and the kitchen fills with that unmistakable yeasty promise that something wonderful is happening behind the towel.
Last winter, during a particularly dreary stretch of gray weekends, I started a Sunday tradition of making these while my coffee brewed. Something about the rhythm of kneading and the quiet anticipation of rising dough became its own meditation. My roommate started wandering into the kitchen around proof time, drawn by the scent, and eventually those mornings evolved into leisurely breakfasts that stretched well past noon.
Ingredients
- Bread flour: The higher protein content creates that signature chewy structure and helps the muffins develop those coveted nooks and crannies inside
- Whole milk: Lukewarm milk activates the yeast gently and adds richness that water alone cannot provide, though any warm milk works beautifully
- Active dry yeast: This is your rising agent, and watching it foam in the warm milk is the first sign that magic is about to happen
- Granulated sugar: Just a tablespoon feeds the yeast and adds a subtle sweetness that balances the savory notes perfectly
- Fine sea salt: Do not skip this, as salt is essential for flavor and helps control the fermentation process
- Unsalted butter: Melted butter enriches the dough, creating a tender crumb and that wonderful golden crust when cooked
- Cornmeal or semolina: This dusting prevents sticking and adds that classic sandy crunch on the outside of each muffin
Instructions
- Awaken the yeast:
- Dissolve the yeast and sugar in lukewarm milk, letting it sit for 5 to 10 minutes until you see a layer of foam on top, which tells you the yeast is alive and ready to work
- Mix the dough:
- Combine the flour and salt in a large bowl, create a well in the center, and pour in the frothy yeast mixture along with the melted butter, mixing until a shaggy, sticky dough forms
- Knead to perfection:
- Turn the dough onto a floured surface and knead for 8 to 10 minutes, feeling it transform from tacky and rough to smooth and elastic under your hands
- Let it rise:
- Place the dough in a lightly oiled bowl, cover it with a clean towel, and let it rest in a warm spot for 1 to 1.5 hours until it has doubled in size
- Shape the muffins:
- Punch down the risen dough, roll it out to 3/4 inch thickness, and cut out circles with a 3 inch round cutter, rerolling scraps until you have 8 muffins
- Second rise:
- Dust a baking sheet with cornmeal, arrange the muffins with space between them, sprinkle more cornmeal on top, and let them proof for 25 to 30 minutes until slightly puffed
- Cook to golden:
- Heat a skillet or griddle over low to medium heat, cook the muffins for 7 to 9 minutes per side until deeply golden, and let them cool on a rack before splitting with a fork
 Pin It
 These muffins became a weekend ritual during my first year of teaching, a small luxury I could control when everything else felt uncertain. Now, whenever I smell cornmeal toasting in butter, I am back in that tiny kitchen, watching steam rise from fresh split muffins while the morning light slanted through the window.
Getting The Rise Right
Temperature matters more than you might expect. If your kitchen runs cool, find the warmest corner, perhaps near an oven that is barely warm or inside a turned off microwave with a cup of hot water. I have learned that patience during the first rise pays off in the final texture, and rushing this step only results in dense, disappointing muffins.
The Fork Split Secret
There is a reason we split English muffins with forks rather than knives. The tines create those rough, craggy interiors that make butter and jam cling to every bite. I tried slicing one once with a serrated knife, and while it looked neat, it lost all that beautiful texture that makes homemade muffins so special.
Storage And Make Ahead Tips
Fresh English muffins keep remarkably well, which means you can bake a batch on Sunday and enjoy them throughout the busy week ahead. Once cooled completely, store them in an airtight container at room temperature for up to 3 days, or freeze them individually wrapped for those mornings when you need something homemade but have zero time.
- Freeze cooled muffins in a freezer bag with parchment paper between each one
- Reheat frozen muffins by toasting them directly from the freezer
- Extra cornmeal on the baking sheet can be saved for the next batch
 Pin It
 These English muffins have become my go to gift for new neighbors or friends who need a little comfort. There is something deeply personal about handing someone a bag of warm, homemade bread, and the first time someone takes that first buttery bite, you know you have shared something real.
Recipe Questions & Answers
- → Why should I split English muffins with a fork?
-
Using a fork creates the signature rough texture inside English muffins. Slicing with a knife flattens those nooks and crannies, reducing surface area for butter and jam to cling to. Simply insert fork tines around the perimeter and pull apart gently.
- → What's the purpose of dusting with cornmeal?
-
Cornmeal prevents the dough from sticking while providing that classic restaurant-style texture on both surfaces. It adds subtle crunch and authentic flavor. Semolina works equally well if you prefer a slightly finer texture.
- → How do I know when the muffins are cooked through?
-
The exterior should reach deep golden brown on both sides. For precision, an instant-read thermometer inserted into the center should register 200°F. If browning too quickly before centers finish, reduce heat slightly and extend cooking time.
- → Can I make these without a griddle?
-
A large cast-iron skillet or heavy-bottomed frying pan works perfectly. The key is maintaining low-medium heat for even cooking without burning. Electric skillets also perform well if you prefer temperature control.
- → How should I store these homemade muffins?
-
Keep at room temperature in an airtight container or bag for up to 3 days. For longer storage, freeze individually wrapped for up to 2 months. Thaw overnight or toast directly from frozen for quick breakfasts.
- → Can I double this batch?
-
Absolutely. Simply multiply all ingredients proportionally. The rising time may increase slightly due to larger dough mass. Consider cooking in two skillets simultaneously or in batches to keep the process efficient.
