 Pin It
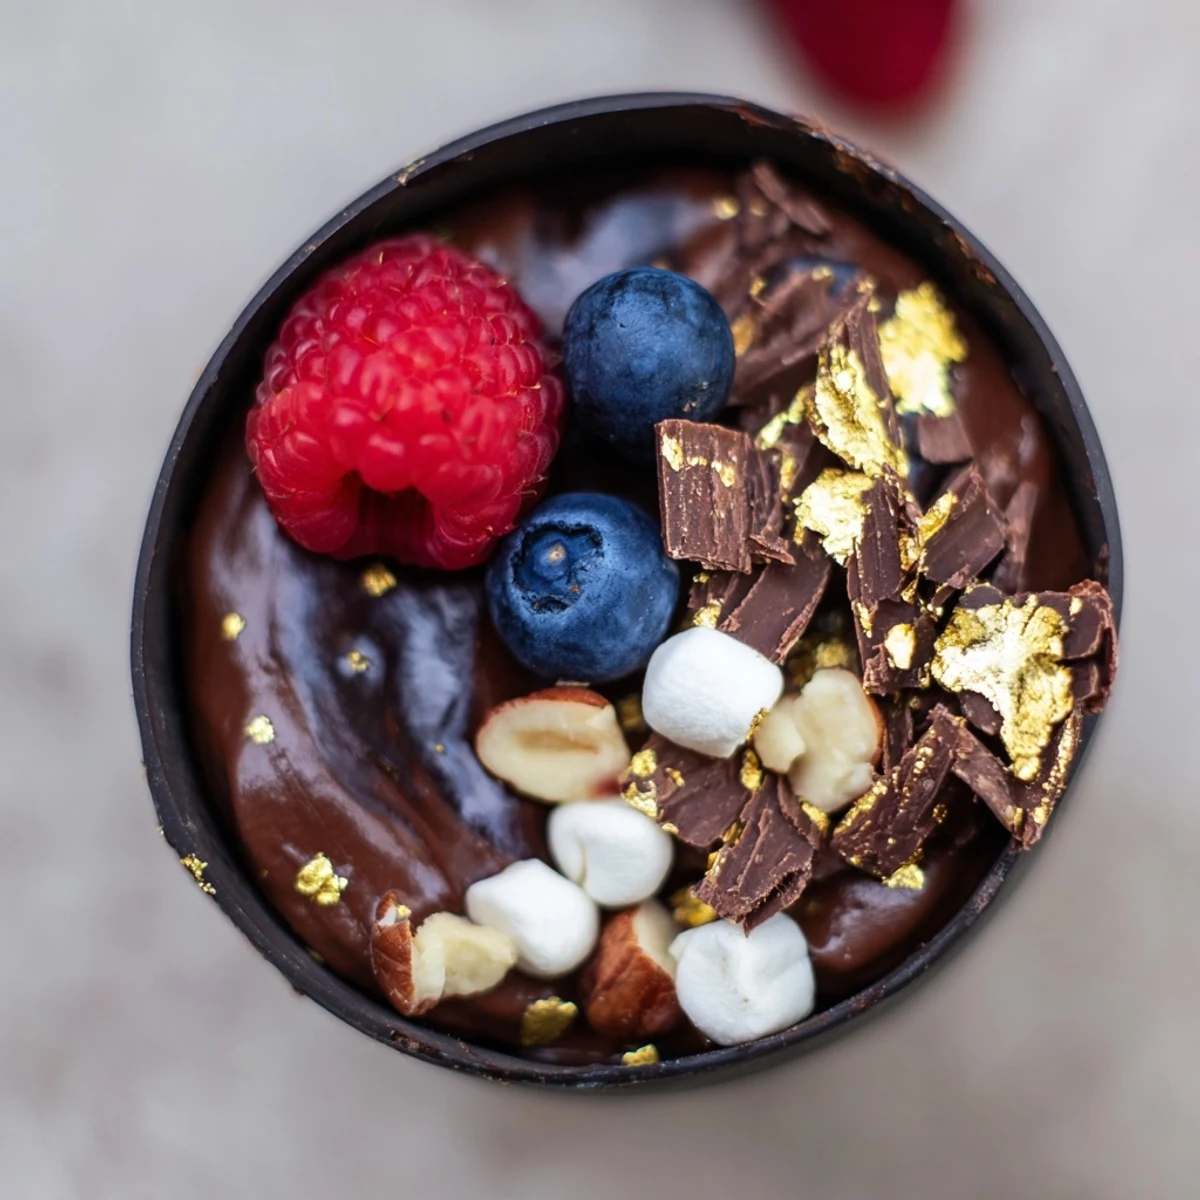
 These decadent chocolate grazing cups feature handcrafted edible chocolate cups filled with silky chocolate mousse and topped with fresh berries, crunchy nuts, mini marshmallows, and chocolate curls. Perfect for dessert tables, parties, or special celebrations.
The preparation involves melting and molding dark chocolate into cup shapes, whipping cream with chocolate for the mousse filling, and artfully arranging colorful toppings for an impressive presentation.
The first time I attempted edible chocolate cups, I ended up with more chocolate on my hands than in the molds. My kitchen smelled like a chocolaterie, and I may have licked the spoon one too many times. Now they're my go-to when I want to impress without spending hours at the stove.
I made these for my best friend's birthday last spring, and she literally gasped when I brought out the tray. Everyone reached for their phones to take pictures before taking a single bite. That moment when presentation meets taste is exactly why I love cooking.
Ingredients
- Dark chocolate (200g for cups): I've learned that 60% cocoa is the sweet spot, bitter enough to be sophisticated but still approachable for chocolate lovers
- Heavy cream (200ml): Cold cream whips faster and holds air better, so pop it in the fridge for at least 15 minutes before starting
- Dark chocolate (100g for mousse): Finely chopped chocolate melts more evenly and prevents those frustrating little unmelted chunks
- Powdered sugar (2 tbsp): The cornstarch in powdered sugar helps stabilize the whipped cream like magic
- Vanilla extract (1 tsp): Pure vanilla makes a difference you can actually taste in such a simple dessert
- Fresh mixed berries (1 cup): Let them come to room temperature before serving so their juices start to run
- Chopped nuts (2 tbsp): Toast them for 3 minutes in a dry pan and the flavor transforms completely
- Mini marshmallows (2 tbsp): These add whimsy and that childhood s'mores nostalgia
- Chocolate curls: Use a vegetable peeler on a room temperature chocolate bar for professional looking curls
Instructions
- Craft the chocolate cups:
- Melt the chocolate in 30 second bursts, stirring between each one, until it's glossy and smooth like liquid silk.
- Coat the liners:
- Use the back of a spoon to create an even layer about 1/8 inch thick, working quickly before the chocolate starts to set.
- Chill until firm:
- The freezer works in 10 minutes if you're pressed for time, but the refrigerator gives a more tempered chocolate that won't crack as easily.
- Prepare the mousse base:
- Melt the chocolate and let it cool until it feels barely warm to the touch, otherwise it will seize when you fold it into the cream.
- Whip the cream:
- Watch carefully—soft peaks should gently droop from the whisk when you lift it, not stand up completely stiff.
- Fold like a pro:
- Add a dollop of cream to the chocolate first to loosen it up, then gently incorporate the rest in two additions to keep all that air you whipped in.
- Fill the cups:
- Pipe the mousse in with a zip-top bag with the corner cut off for the cleanest look.
- Garnish generously:
- Arrange toppings in clusters rather than scattering them for that curated grazing aesthetic.
- Final chill:
- Twenty minutes lets everything set together so the flavors can meld.
 Pin It
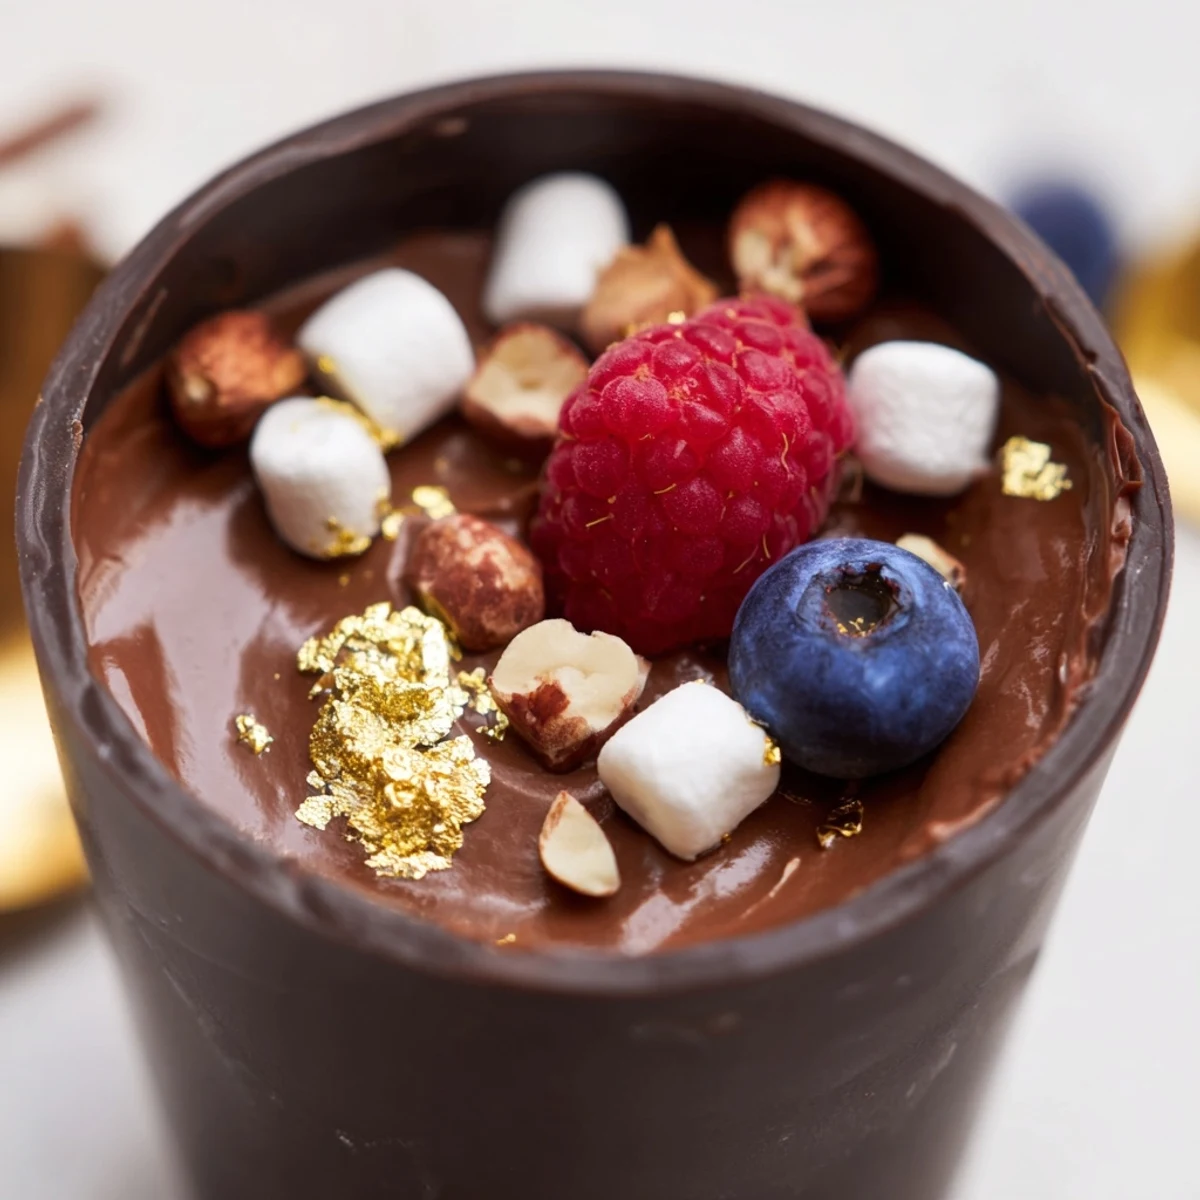
 These became my signature after I served them at a dinner party where someone actually asked if I'd ordered them from a bakery. Now whenever friends come over, they half-jokingly ask if the chocolate cups are making an appearance.
Make Ahead Magic
You can prepare the chocolate cups up to three days in advance if stored in an airtight container with parchment paper between layers. The mousse holds beautifully for 24 hours, though I've learned to garnish right before serving so the berries stay fresh and perky.
Chocolate Tempering Tricks
Professional chocolatiers temper their chocolate for that glossy finish and satisfying snap, but honestly, I skip it for home recipes. If you want that professional sheen, simply melt two-thirds of your chocolate, then stir in the remaining chopped pieces until they melt and the mixture cools to about 88°F.
Serving And Storage
These cups are best enjoyed within 24 hours of assembly, as the chocolate shell can start to soften from the moisture in the mousse. Serve them chilled but not ice cold, about 15 minutes out of the refrigerator, so the mousse texture is at its silkiest.
- Place each cup on a small plate or napkin since chocolate can leave fingerprints
- Provide small spoons for guests who want to scrape every last bit of mousse
- Consider offering plain cups alongside decorated ones for chocolate purists
 Pin It
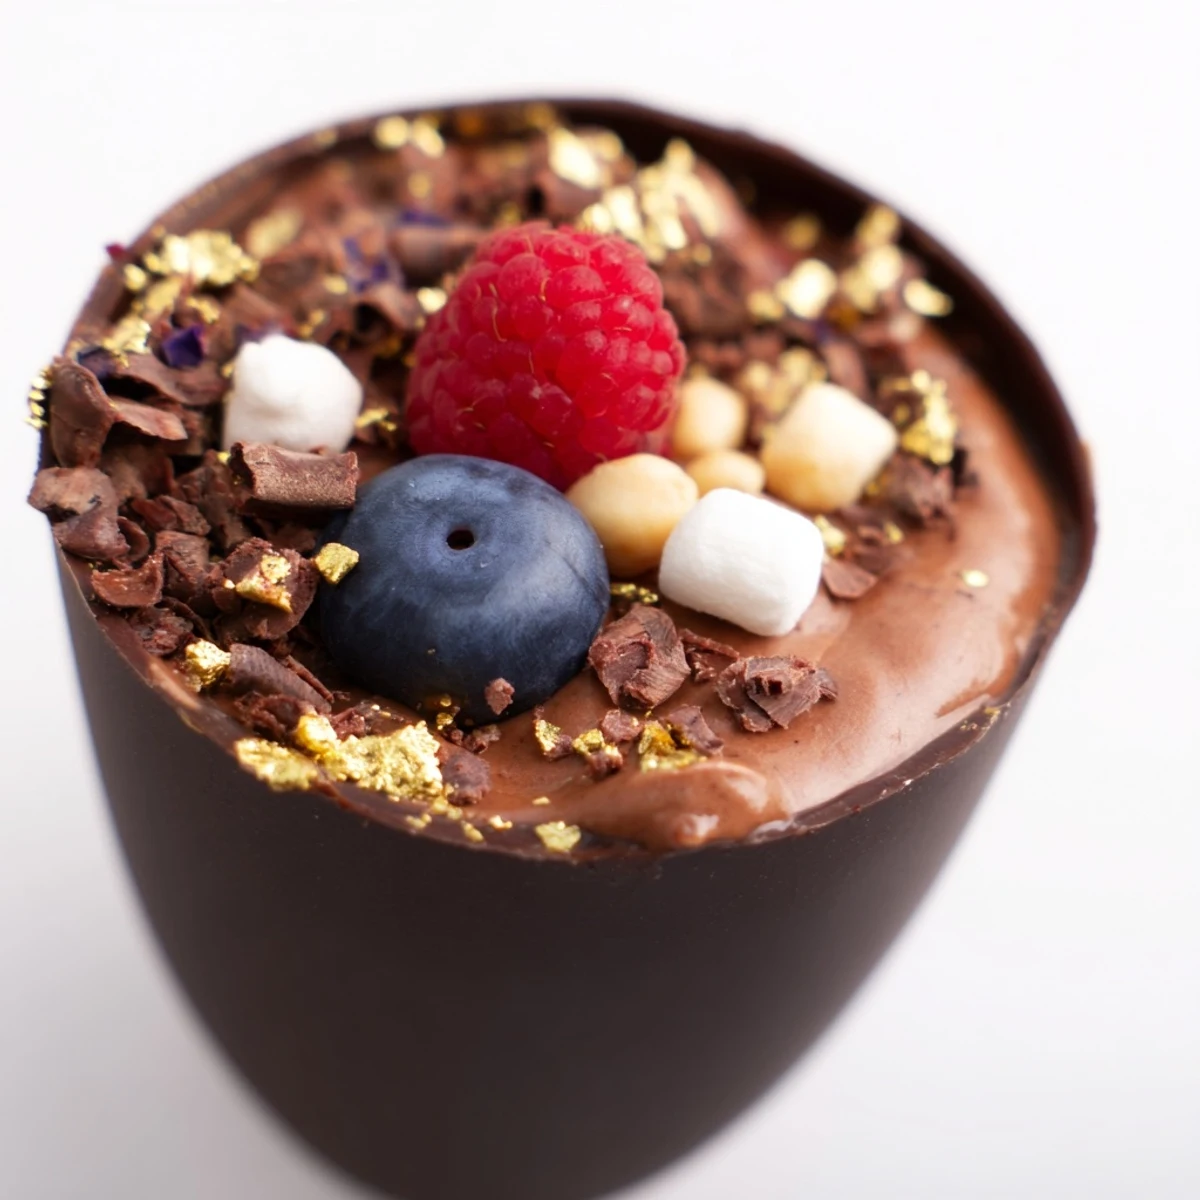
 These little cups remind me that the most impressive desserts often come from the simplest techniques, executed with a little patience and a lot of chocolate.
Recipe Questions & Answers
- → How far in advance can I make chocolate grazing cups?
-
Best enjoyed the same day for optimal texture. You can prepare chocolate cups and mousse up to 24 hours ahead, storing separately in the refrigerator. Assemble just before serving to maintain crispness.
- → What other chocolates work for these cups?
-
While dark chocolate provides the best structure and intense flavor, you can use milk or white chocolate for variety. Keep in mind that milk and white chocolate are softer, so chill longer before removing from liners.
- → Can I make these without cupcake liners?
-
Yes, you can use silicone molds specifically designed for chocolate cups, or paint melted chocolate onto the inside of small glass bowls or ramekins. Alternatively, use mini phyllo tart shells as a base.
- → What toppings pair well with chocolate mousse?
-
Fresh berries like raspberries, strawberries, and blueberries complement dark chocolate beautifully. Chopped hazelnuts, almonds, or pistachios add crunch. For extra indulgence, try crushed cookies, toasted coconut, or caramel drizzle.
- → How do I store leftover assembled cups?
-
Store assembled cups in an airtight container in the refrigerator for up to 2 days. Note that the chocolate cups may soften slightly over time. For best results, keep components separate and assemble shortly before serving.
- → Can I make these alcohol-free?
-
Absolutely. The orange liqueur mentioned in variations is completely optional. The chocolate mousse is delicious without any alcohol, relying on vanilla extract for flavor enhancement.
